Capturing your MacOS computer audio in a BlueJeans meeting with OBS
11 April 2020
So you’re already streaming great content over your OBS setup, but you want to add the functionality of joining a BlueJeans (replace with your favorite virtual meeting application like Zoom, Google Meet, WebEx…) meeting and sharing it with your stream.
If you already tried, you’ve noticed that the video capture is not a problem, but you don’t have the meeting audio in your stream.
Well, then this post is for you.
Install iShowU Audio Capture
First you need to install an extension called iShowU Audio Capture to capture the audio from your computer.
If you’re using MacOS Catalina, follow the instructions in this link.
With earlier versions of MacOS should follow the instructions here.
Create a Multi-Output Audio Device
- Open the “Audio MIDI Setup” application
- We’ll create a new virtual device on your computer that will basically aggregate multiple audio outputs in a single one. This way your computer will be able to send the sound to both your speakers and the iShowU Audio Capture (which will later be used as an input device in OBS).
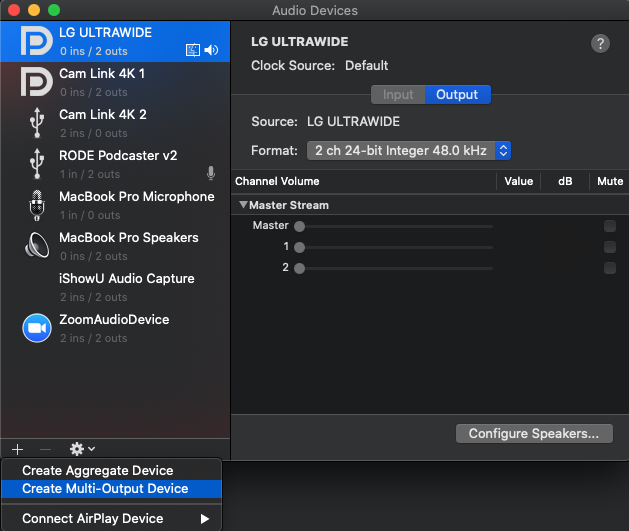
- Now configure your Multi-Output Device by checking the “Use” column with “iShowU Audio Capture” and your default audio device. In this particular example we’ll be using the “MacBook Pro Speakers” as our sound output.
- Also check the “Drift Correction” on your default audio device. Once again in our example it’s “MacBook Pro Speakers”.

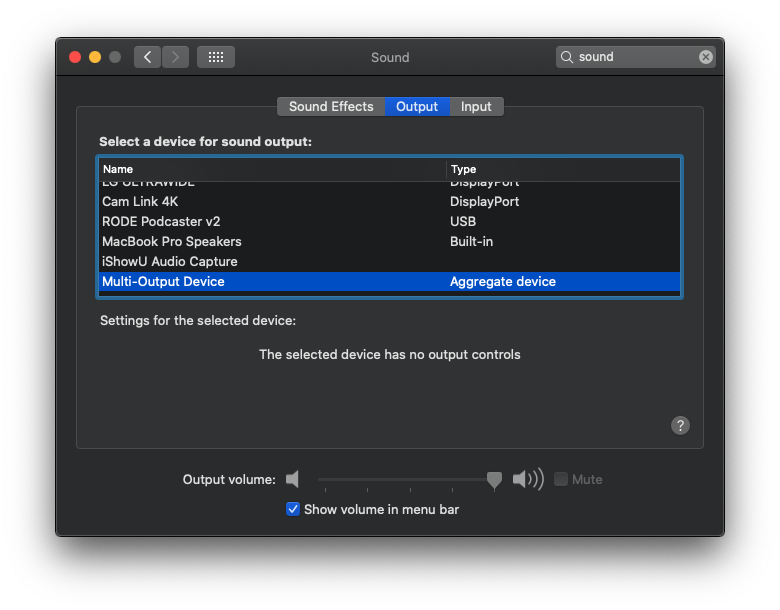
- Now set your default sound output on your Mac to the new “Multi-Output Device” that we created.
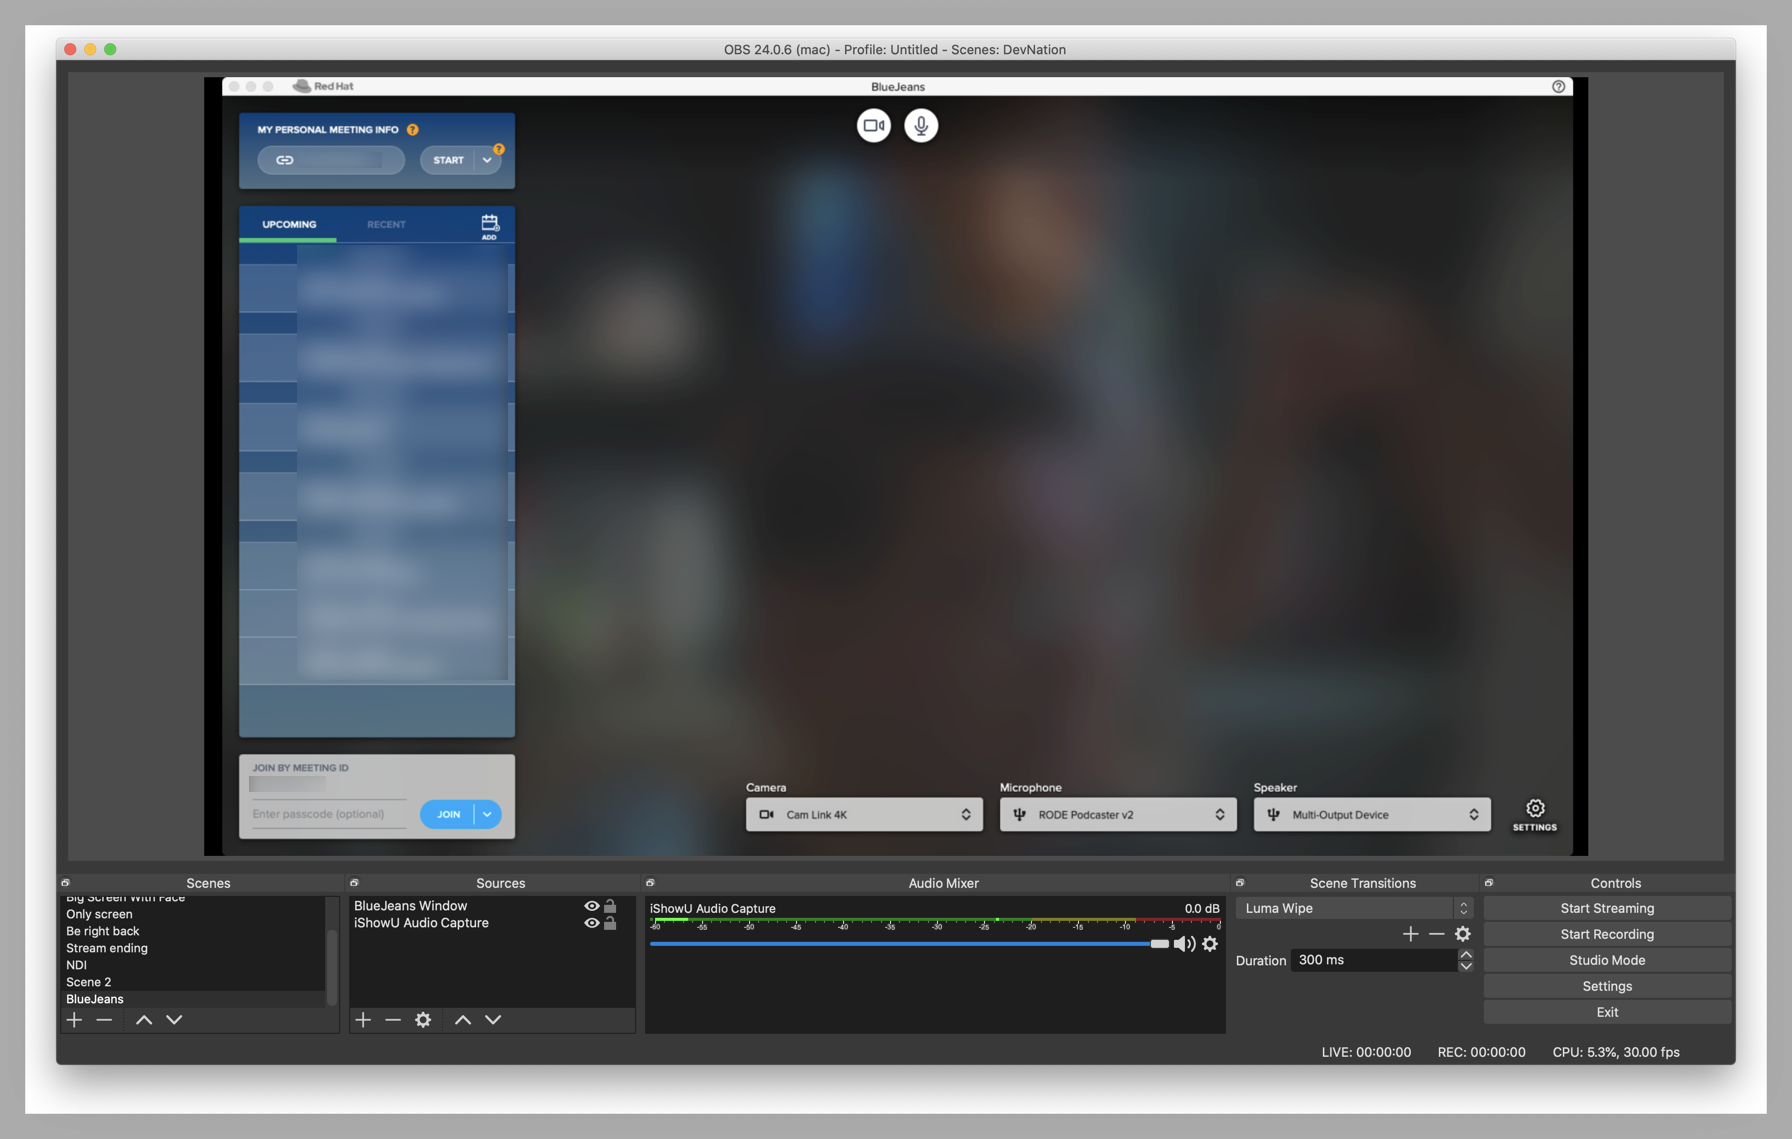
Configuring OBS
Now that we have everything set to capture our computer audio, we can configure OBS for the streaming.
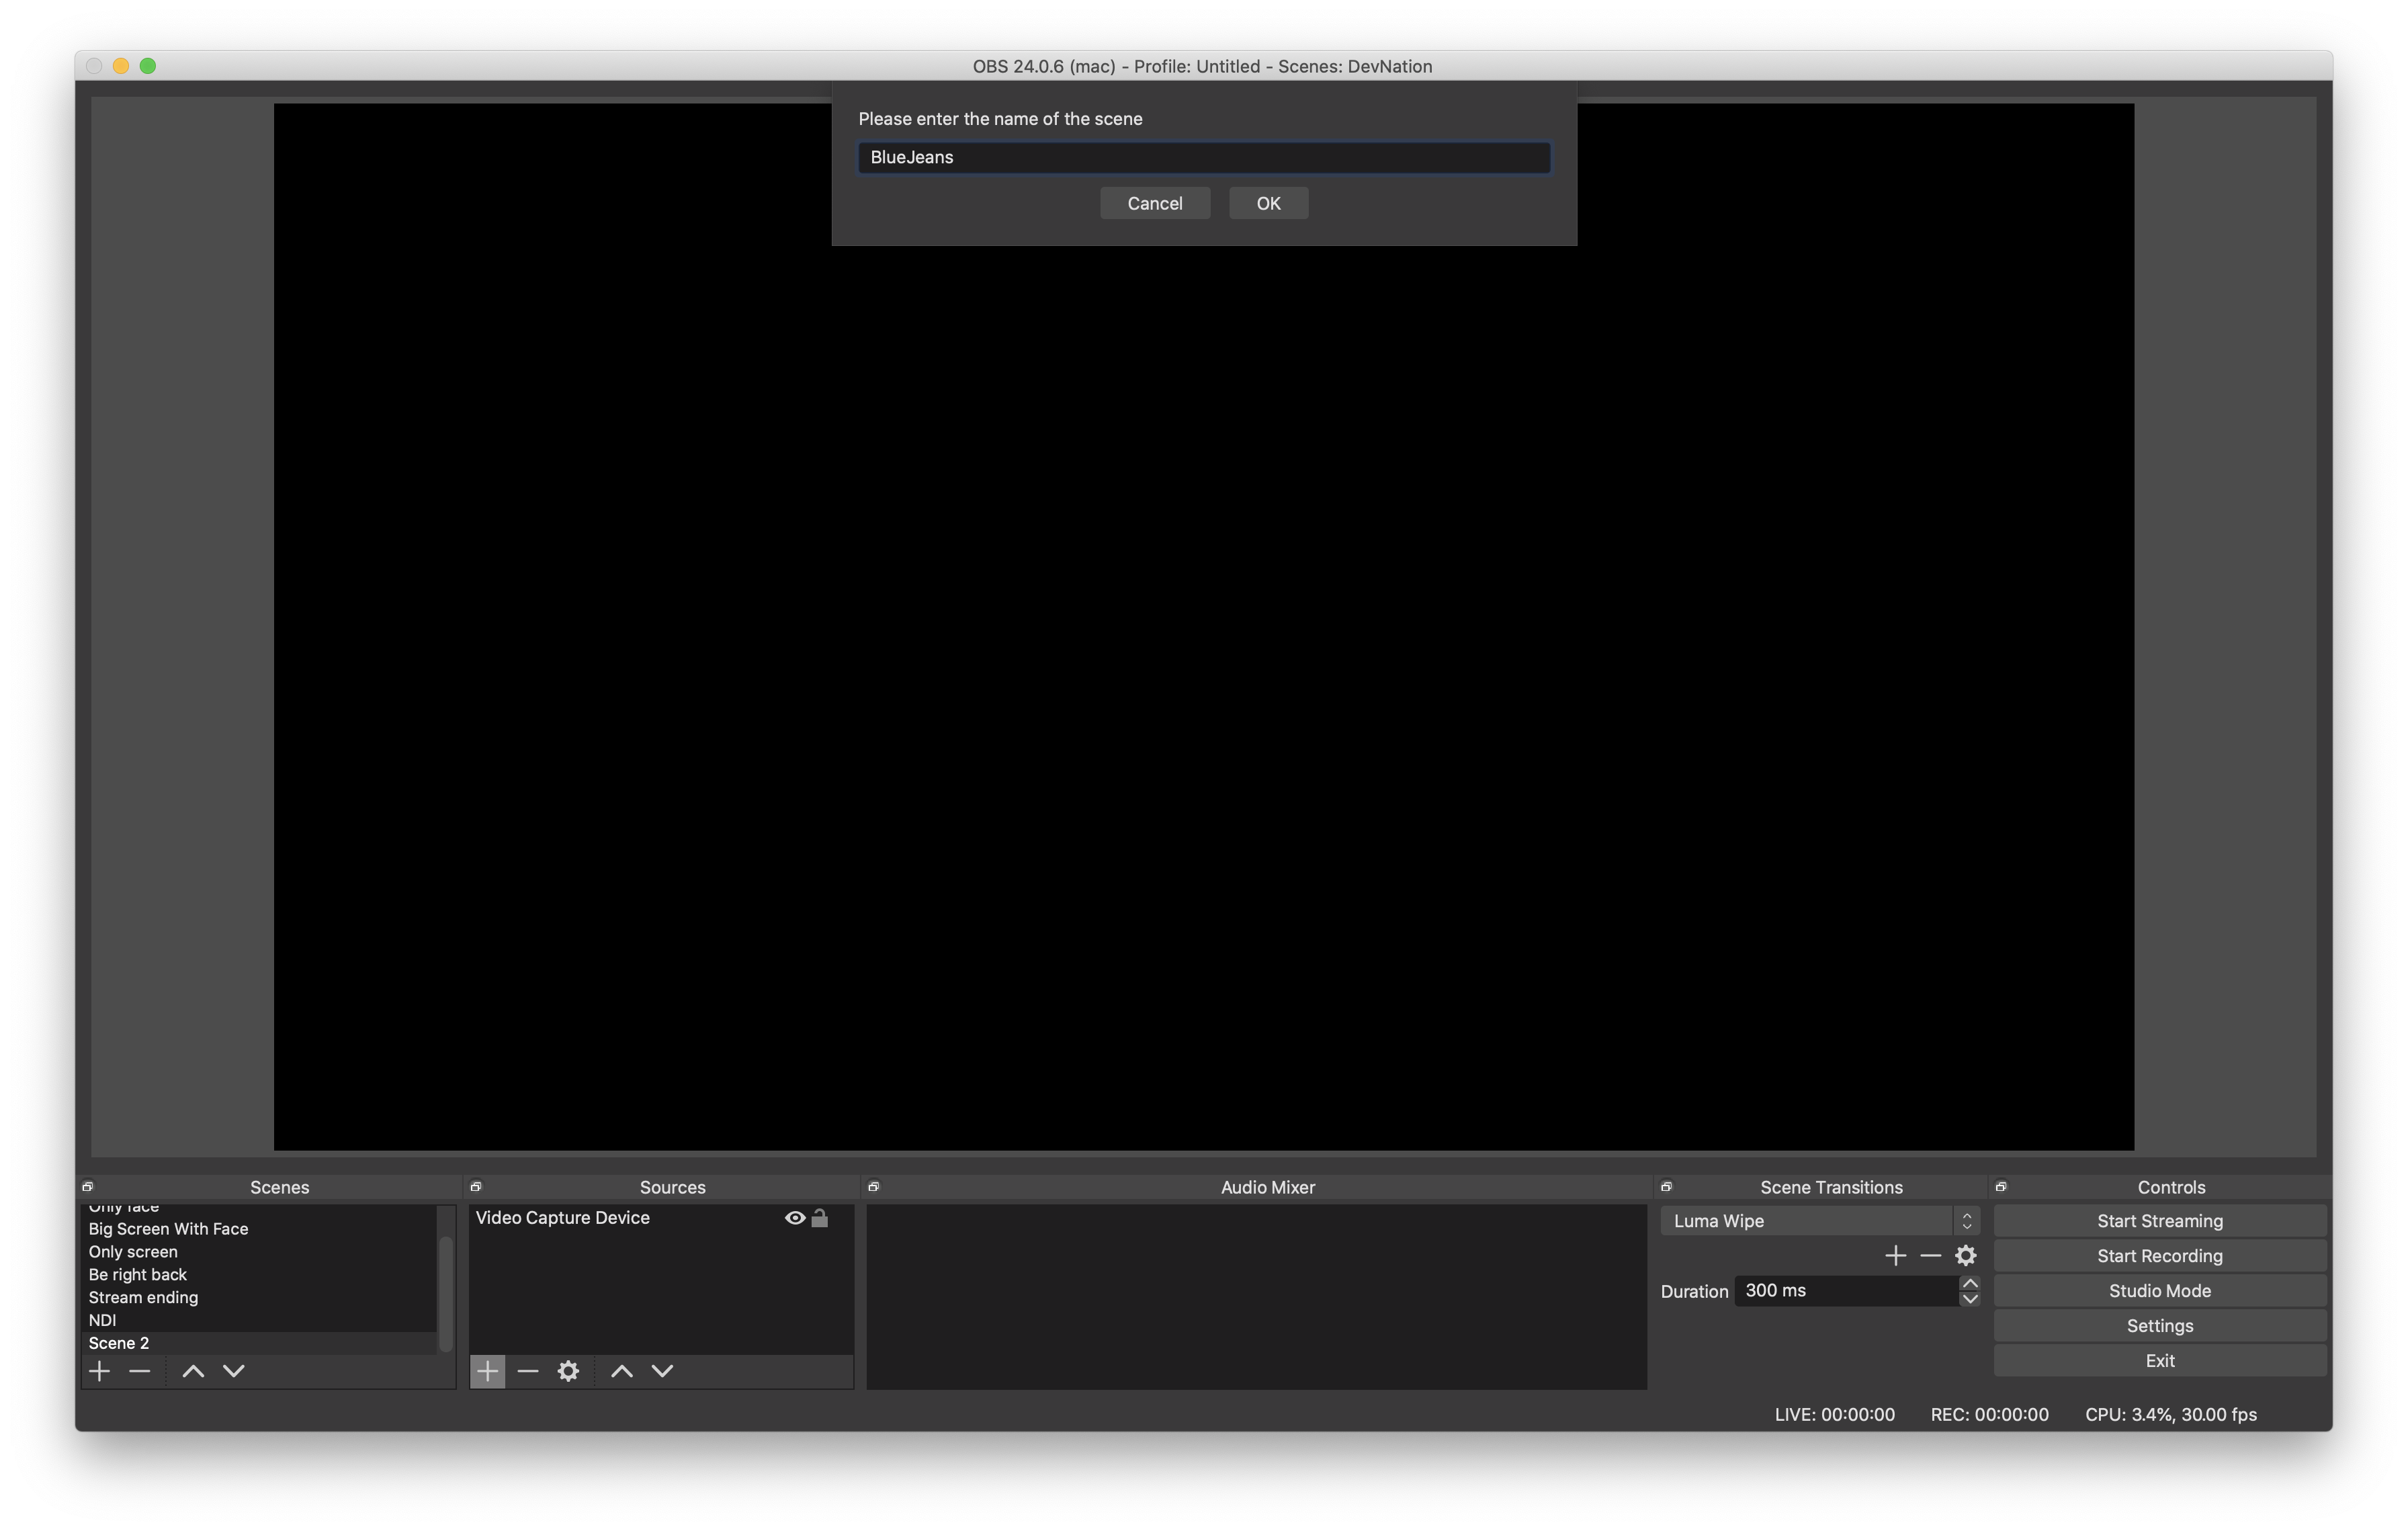
- Create a new Scene and name it “BlueJeans”
- Add a new “Audio Input Capture” Source
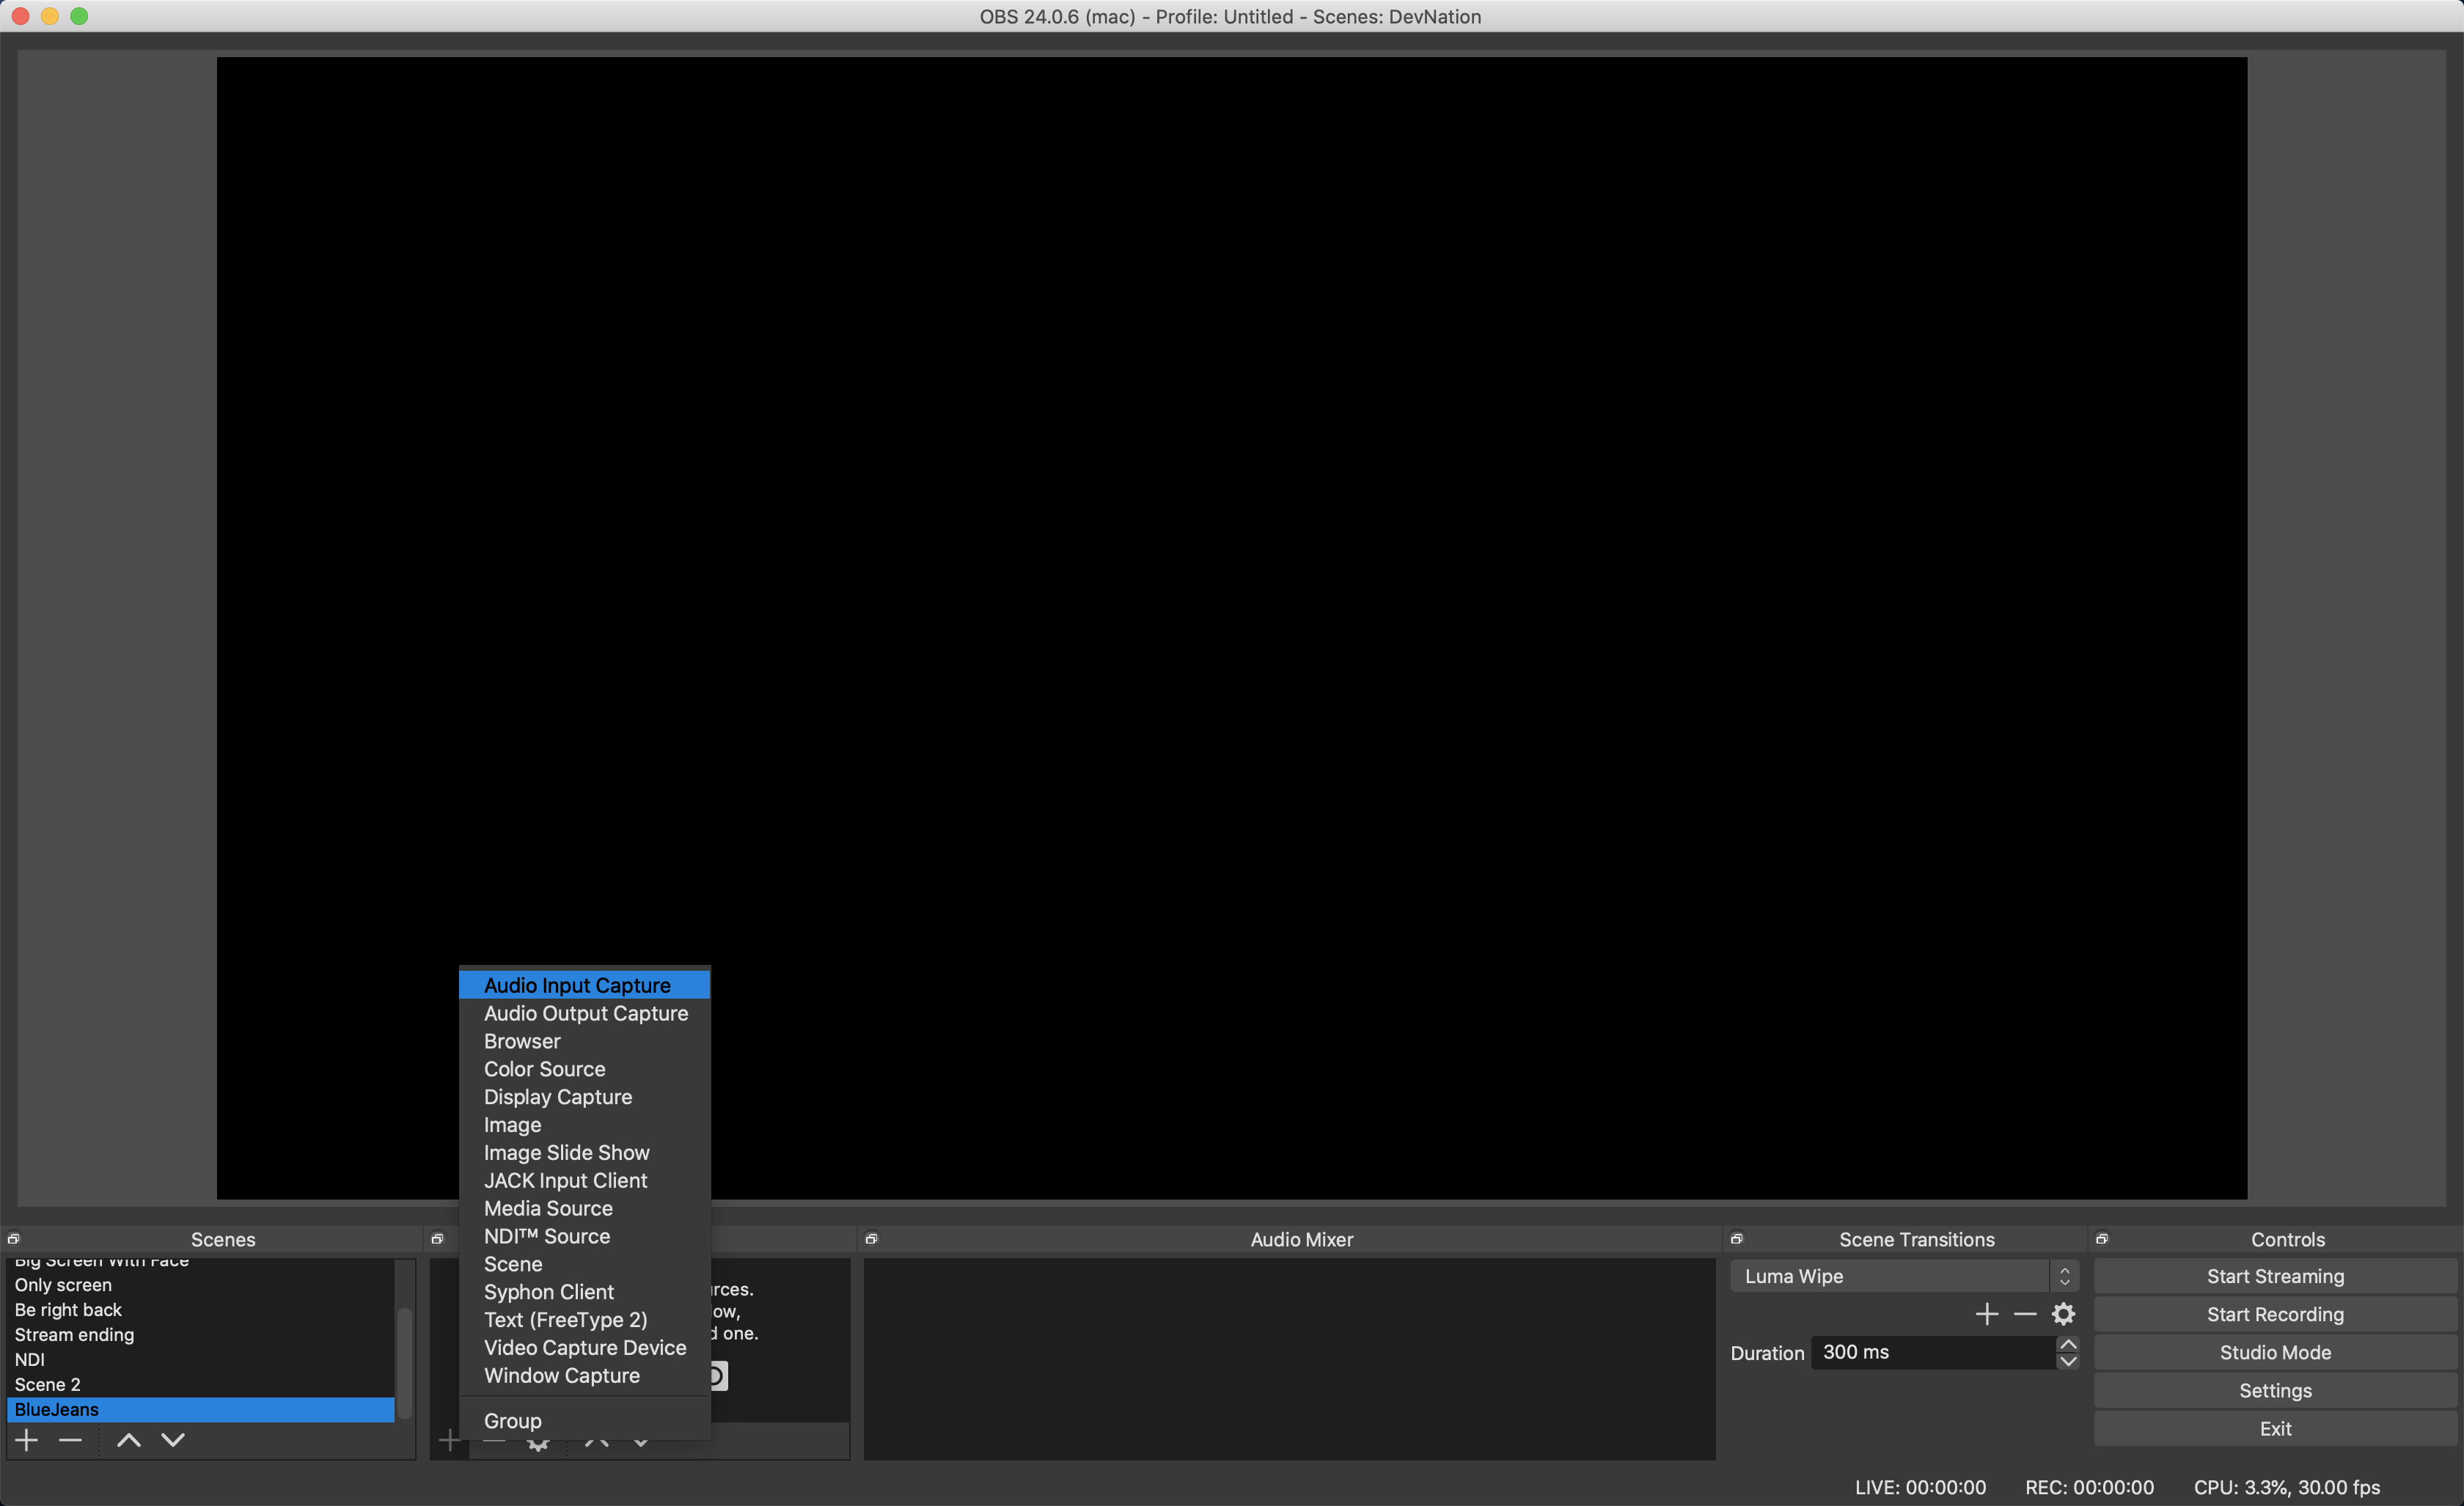
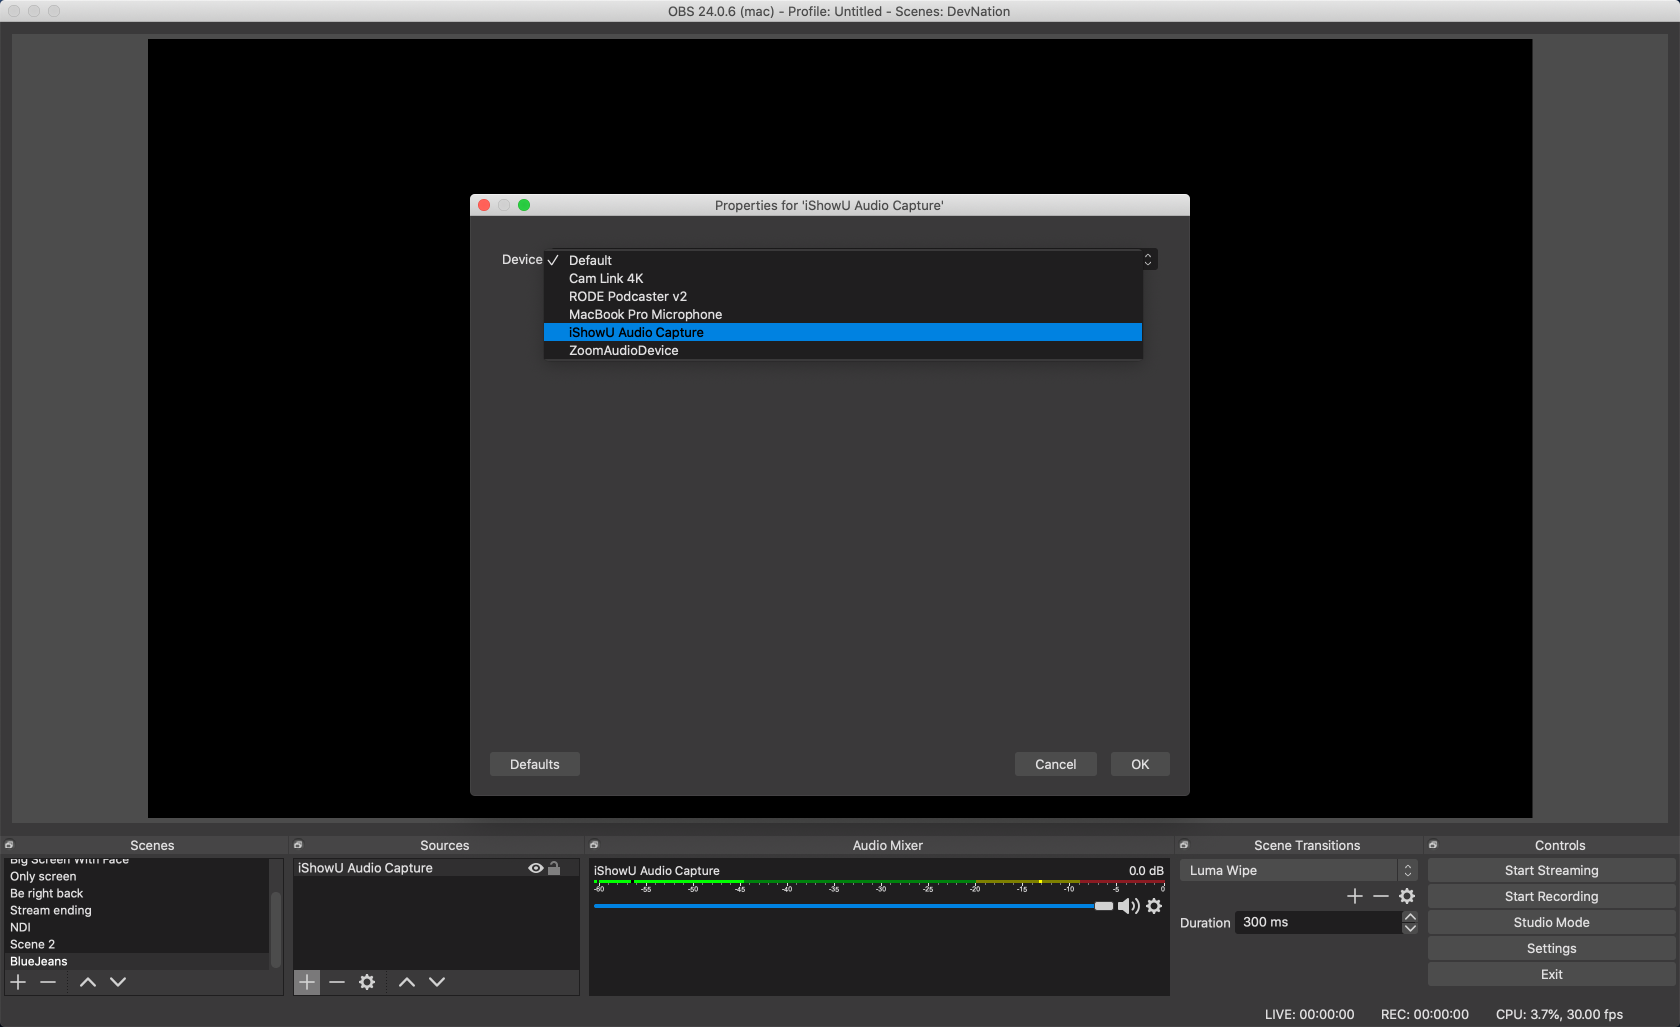
- Name it “iShowU Audio Capture”
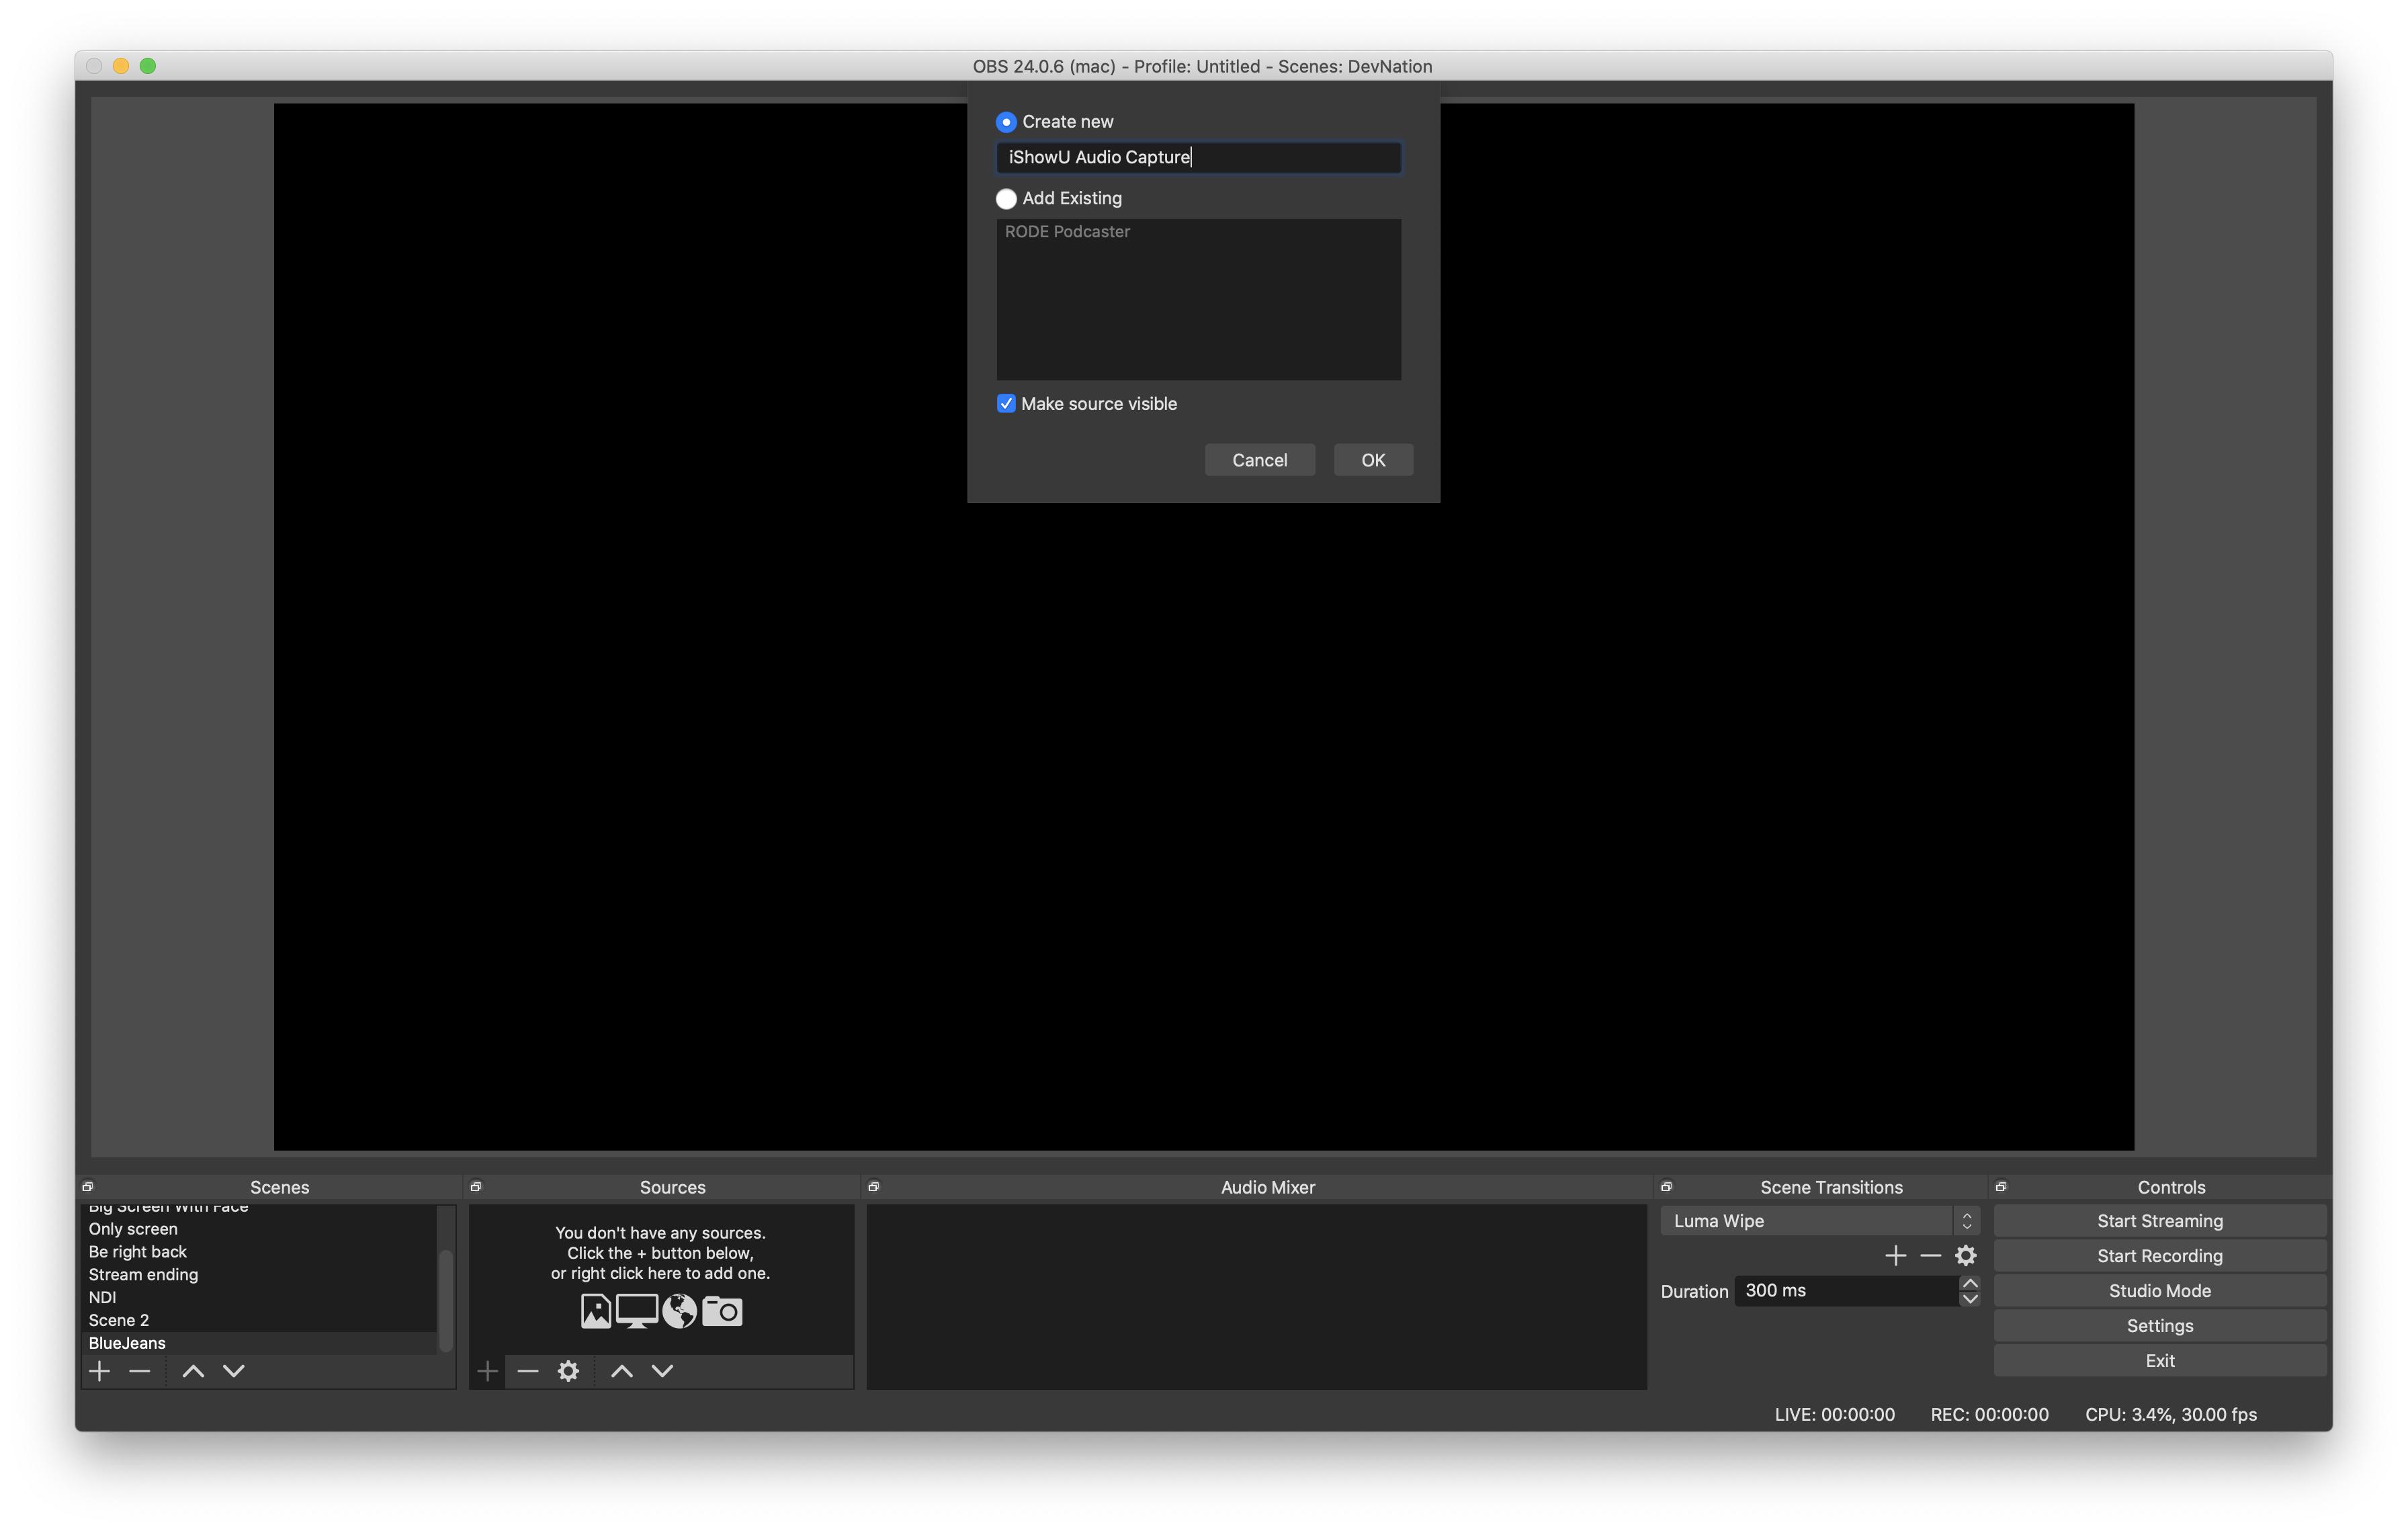
- Choose the “iShowU Audio Capture” device that we created
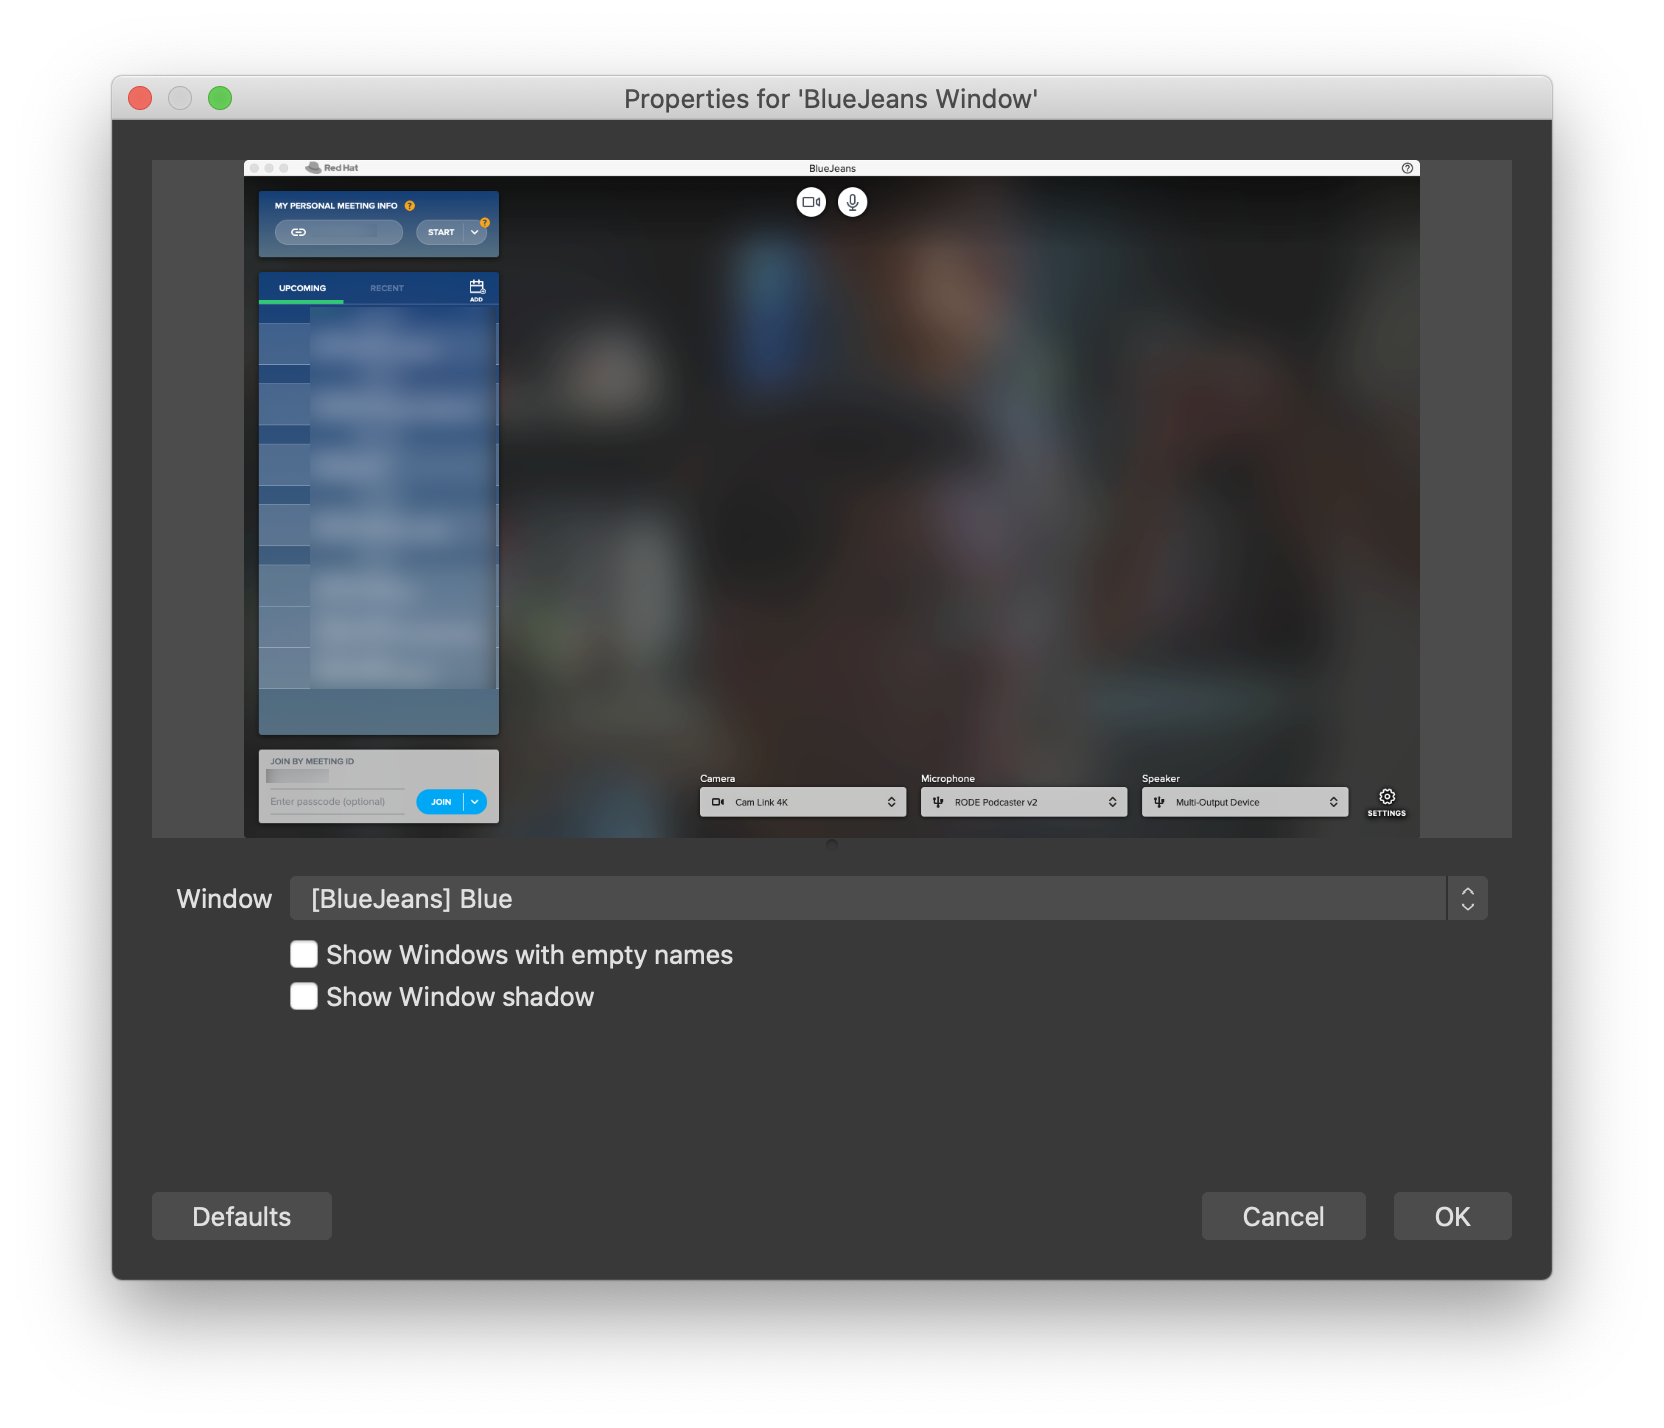
- Add a new “Window Capture” Source
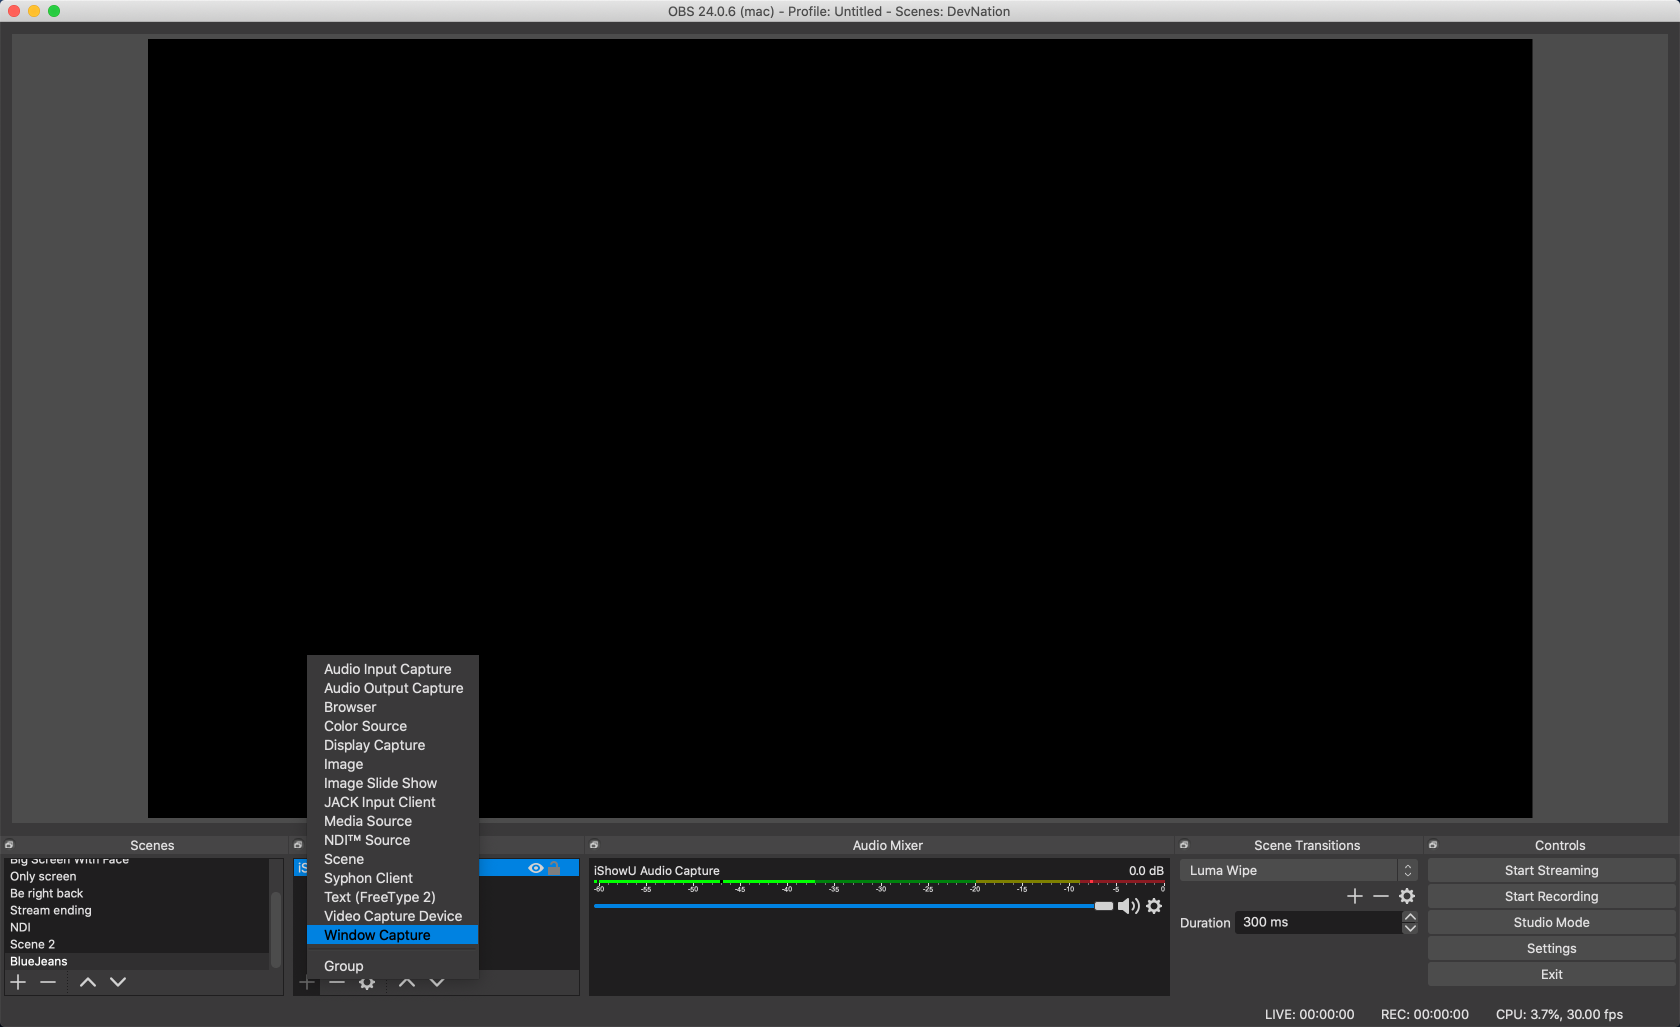
- Name it “BlueJeans Window”
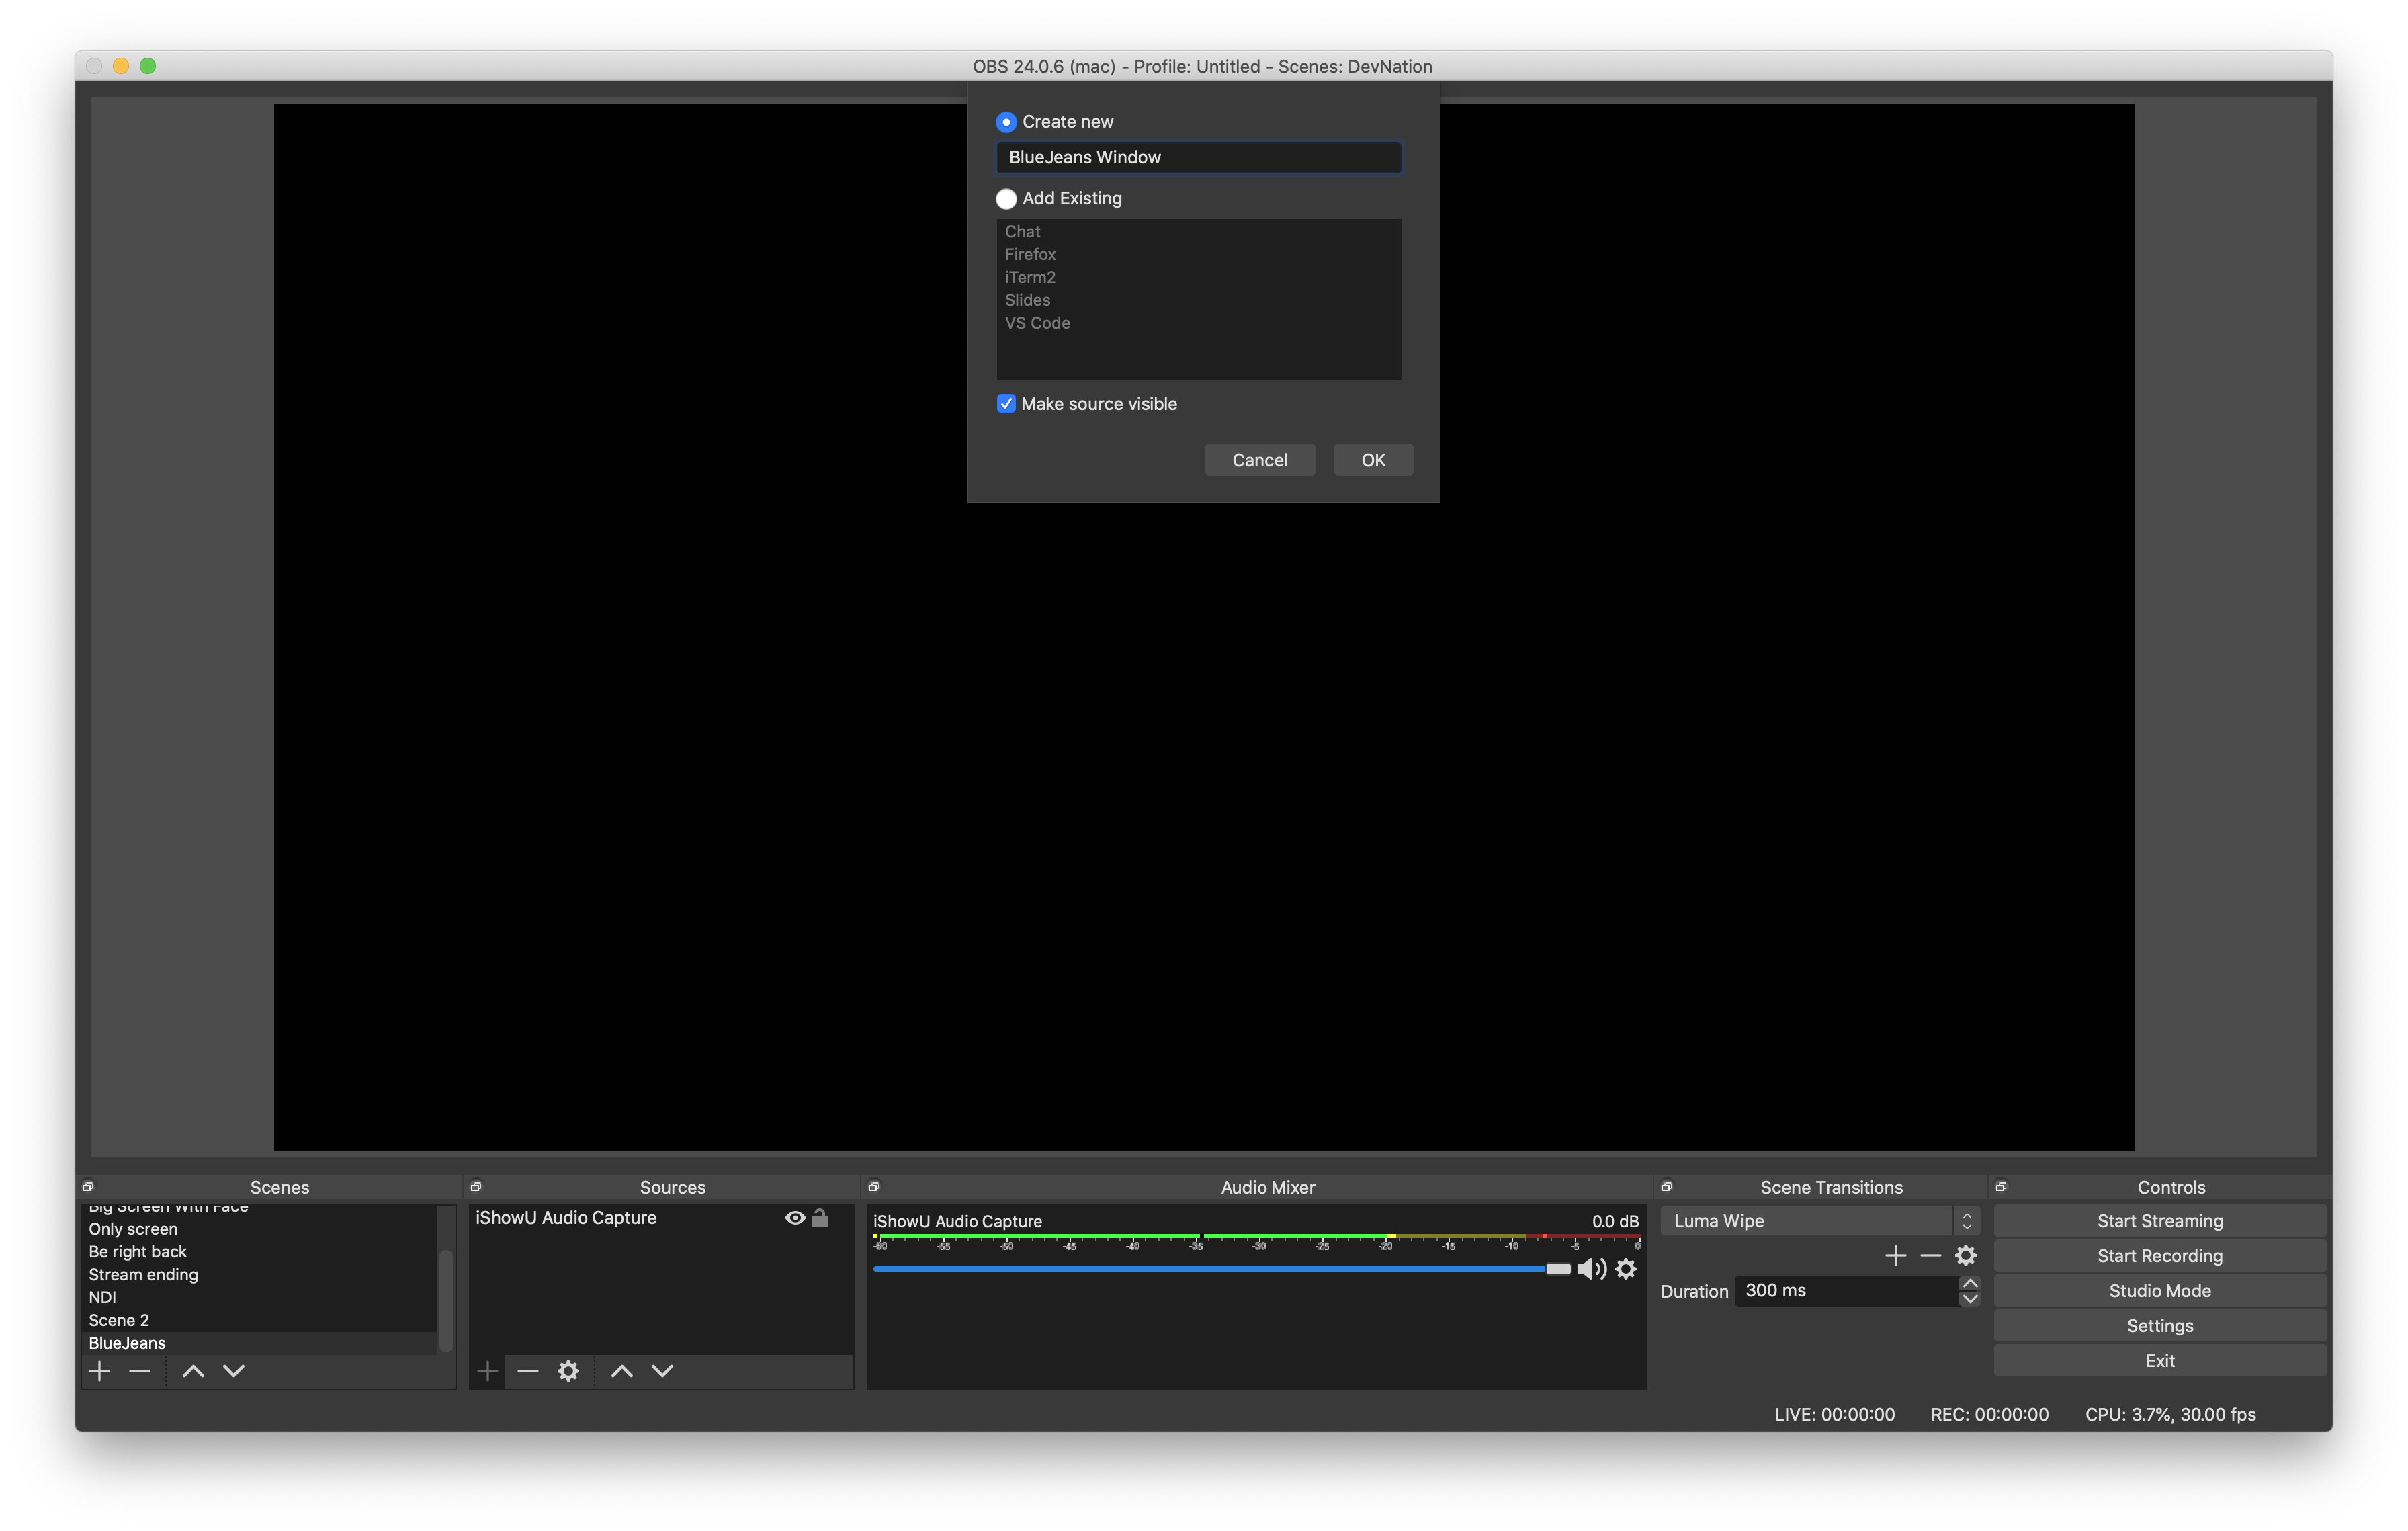
- Make sure that your BlueJeans app is already running, and choose the window “[BlueJeans]”
Congratulations! You’re ready to share your meeting in your OBS stream.