YouTube Streaming with Ultra-Low Latency with OBS on MacOSX
08 June 2020
![]()
I’ve spent weeks in the past few months (thanks to the self-quarantine we had with the COVID-19 pandemic), and had enough time to play with many different streaming configurations on YouTube.
Right now I believe I’ve found a very good combination for our live streaming presentations with ultra-low latency. This mode allows us to have a nicer interaction with the audience to run our live demos, polls, and even interact with people in the chat.
From my experiments, we are able to perform the streaming with a latency between 3s to 4s. I counted the latency from the moment I spoke something until the moment I was able to hear myself on the stream. Enabling the DVR option in the YouTube studio console might add some extra latency, but I didn’t notice anything significant.
And, most important of all, this configuration doesn’t raise our CPU temperature too much. Major issues occurs when the CPU gets too hot and your Mac starts to throttle the CPU frequency to cool it down and prevent a CPU burn. I might say that 99% of the issues I had when streaming where caused by my CPU reaching more than 90 degrees Celsius. With this settings, and this cooling pad, I’m able to stream with a CPU temperature between 77 and 82 degrees Celsius.
Video settings
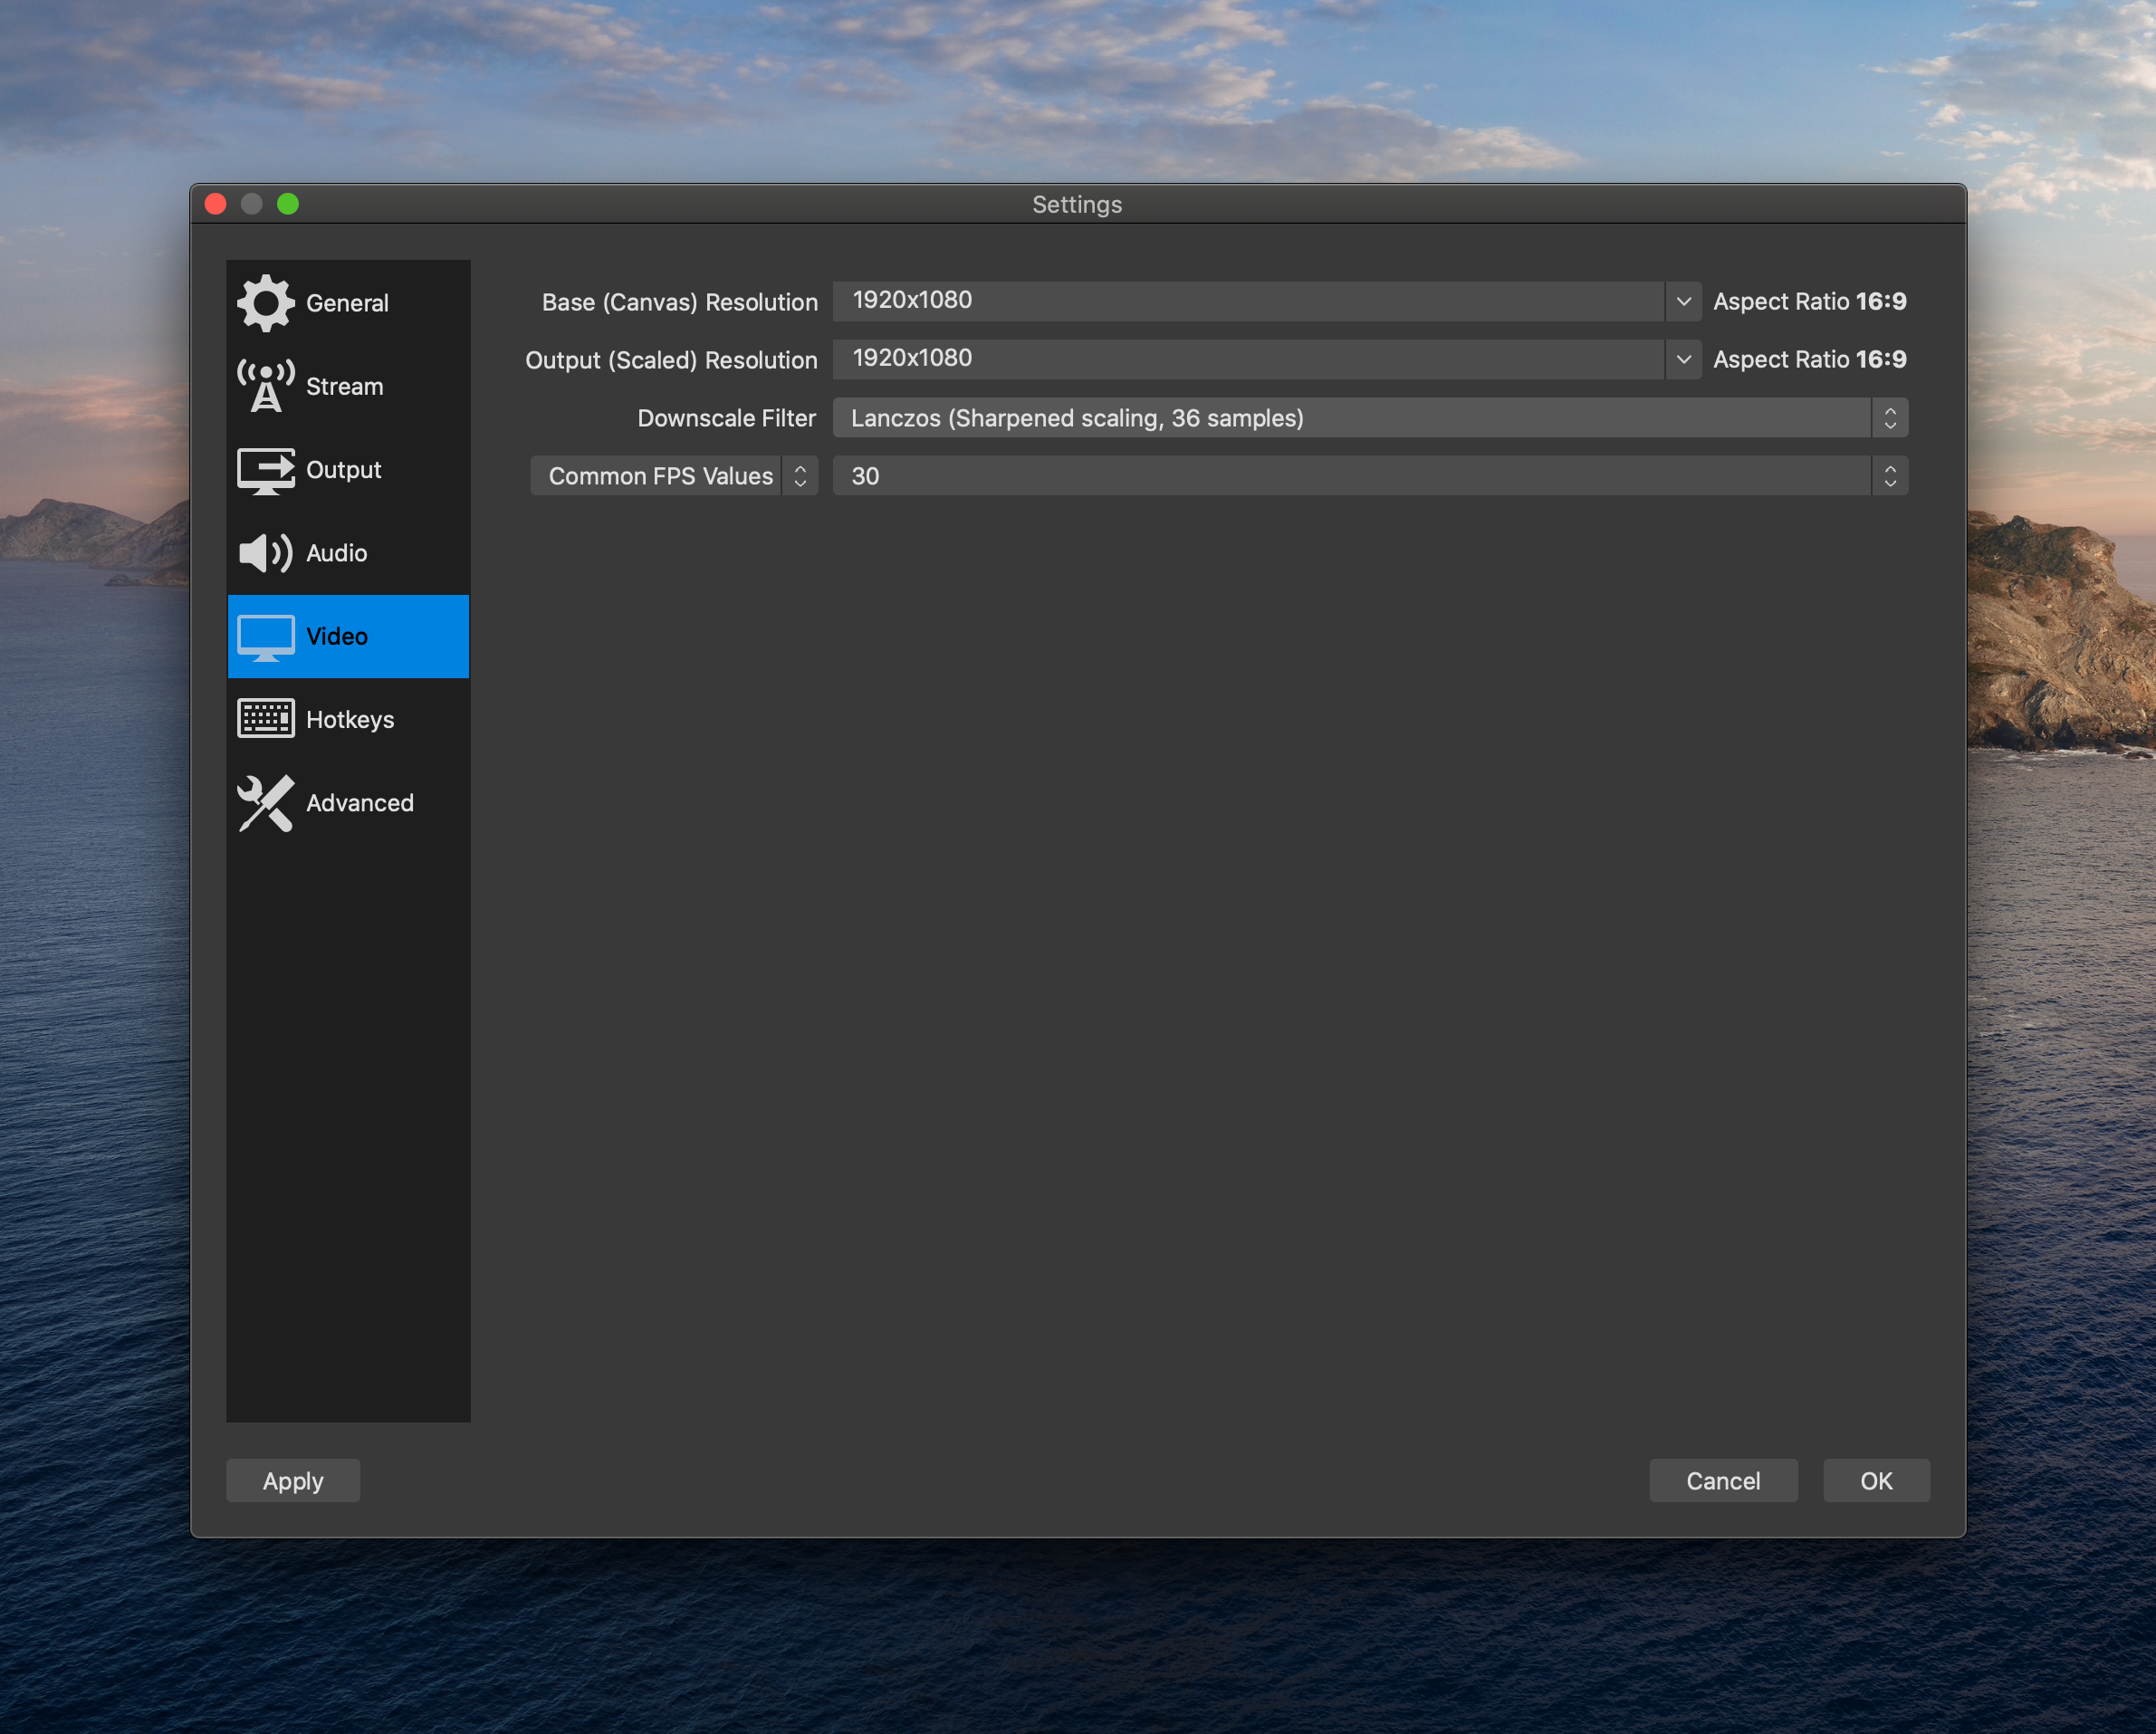
- I’m streaming with 1080p resolution, and I use the same resolution for both the canvas and output (which I consider to be a best practice). Just in case you need to downscale to 720p for performance or bandwidth issues, choose the Lanczos Filter, as it will provide you with better quality at the expense of a small increase in processing.
Audio settings
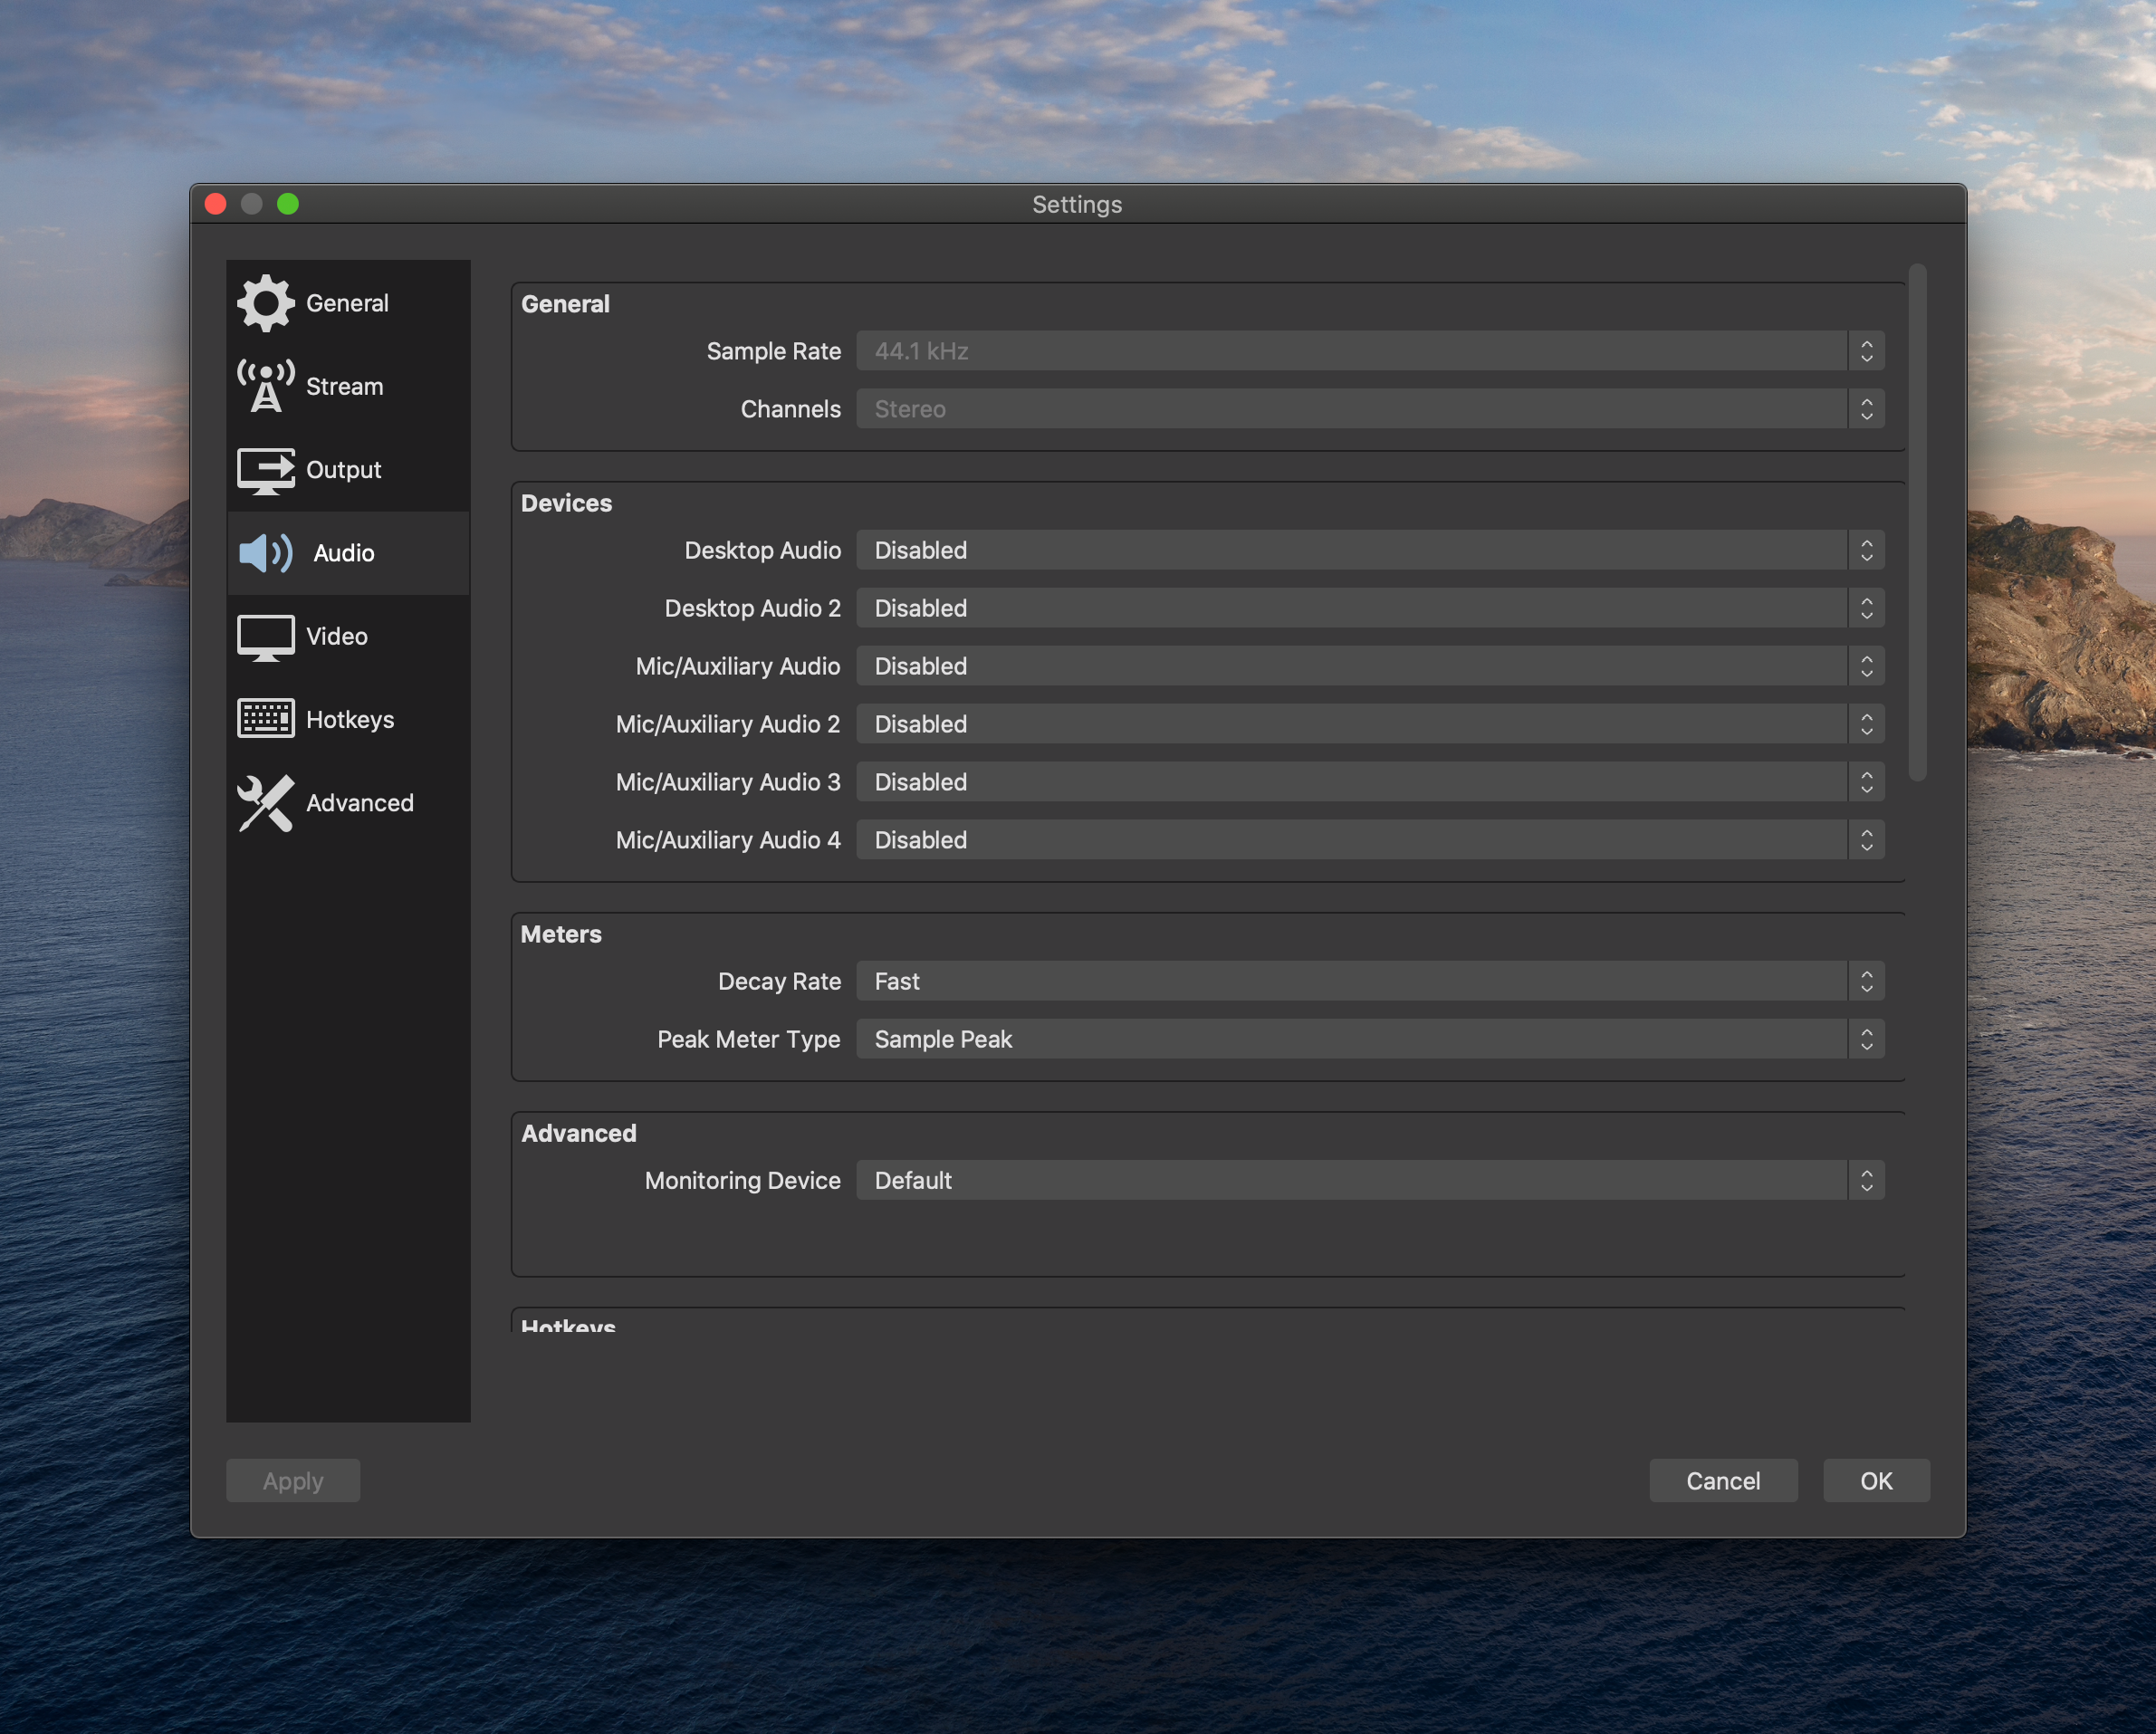
- YouTube recommends the 44.1 kHz Sample Rate for audio, so that’s what we’re using. We’re not singing anyway, so 44.1 kHz instead of 48 kHz is more than enough for our voice.
Output settings
This is where most of the tweaking happens.
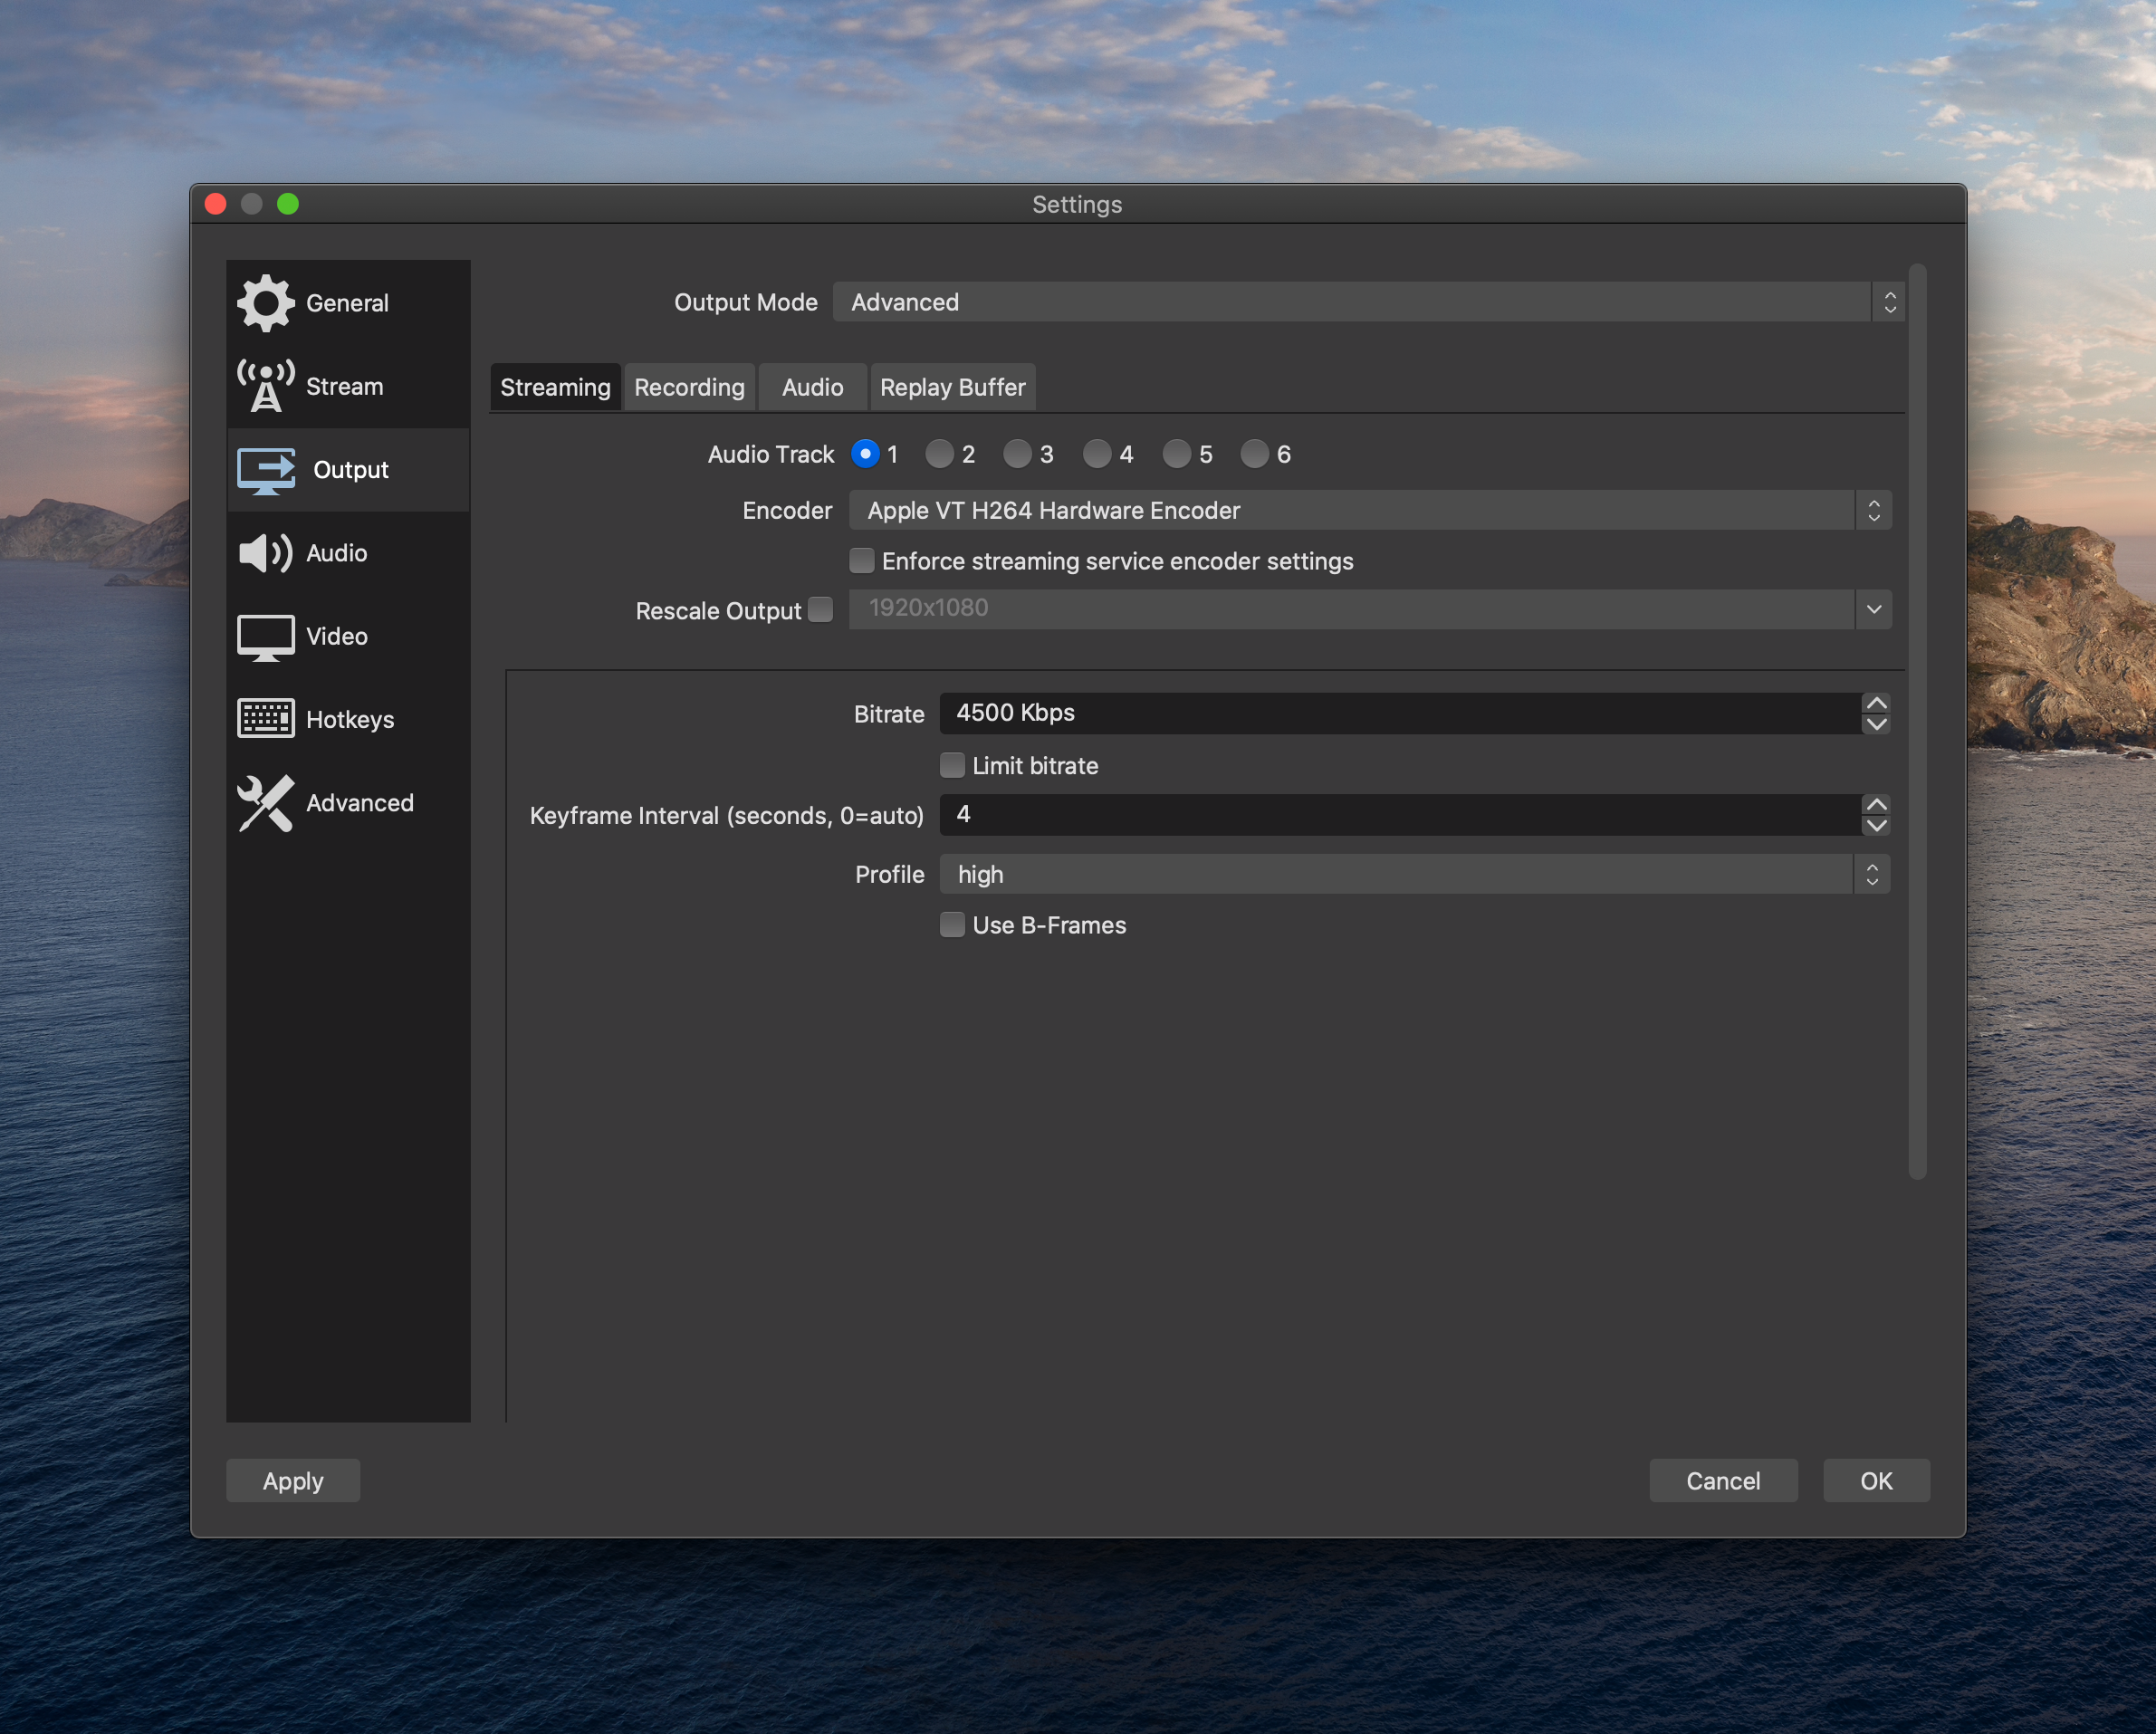
- First, you’ll notice that you have an “Output Mode” option. Choose the “Advanced” one, as the “Simple” one doesn’t allow you to fine tune the streaming.
Streaming tab
- All of my Macs have this option, so I’m assuming most newer Mac machines provide this encoder. Choose the “Apple VT H264 Hardware Encoder”. This is the most important option, as it will allow you to delegate the processing to your GPU instead of consuming your CPU cycles. With this enabled, streaming consumes less than 9% of my CPU overall when live.
- Disable the “Enforce streaming service encoder settings” as it causes some issues.
- Set the bitrate to “4500” kbps. For 1080p, YouTube recommends something between 4500 kbps and 6000 kbps. 4500 kbps works fine, and with 6000 kbps it sometimes complains that it’s too much, as the bitrate tends to vary a bit during the streaming.
- Set the “Keyframe Interval” to “4”. 0 is “auto”, but YouTube constantly complains about it.
- Set the “Profile” to “high”, as it allows you to use better encoding algorithms. Less powerful machines won’t even show this option. In this case, stick to “main” (or strongly consider upgrading your machine).
- Last, make sure the the “Use B-Frames” options is not enabled. You will have issues during the streaming if you leave it enabled, and most of the times the “Go Live” button won’t even turn blue in the YouTube Studio console.
Audio tab
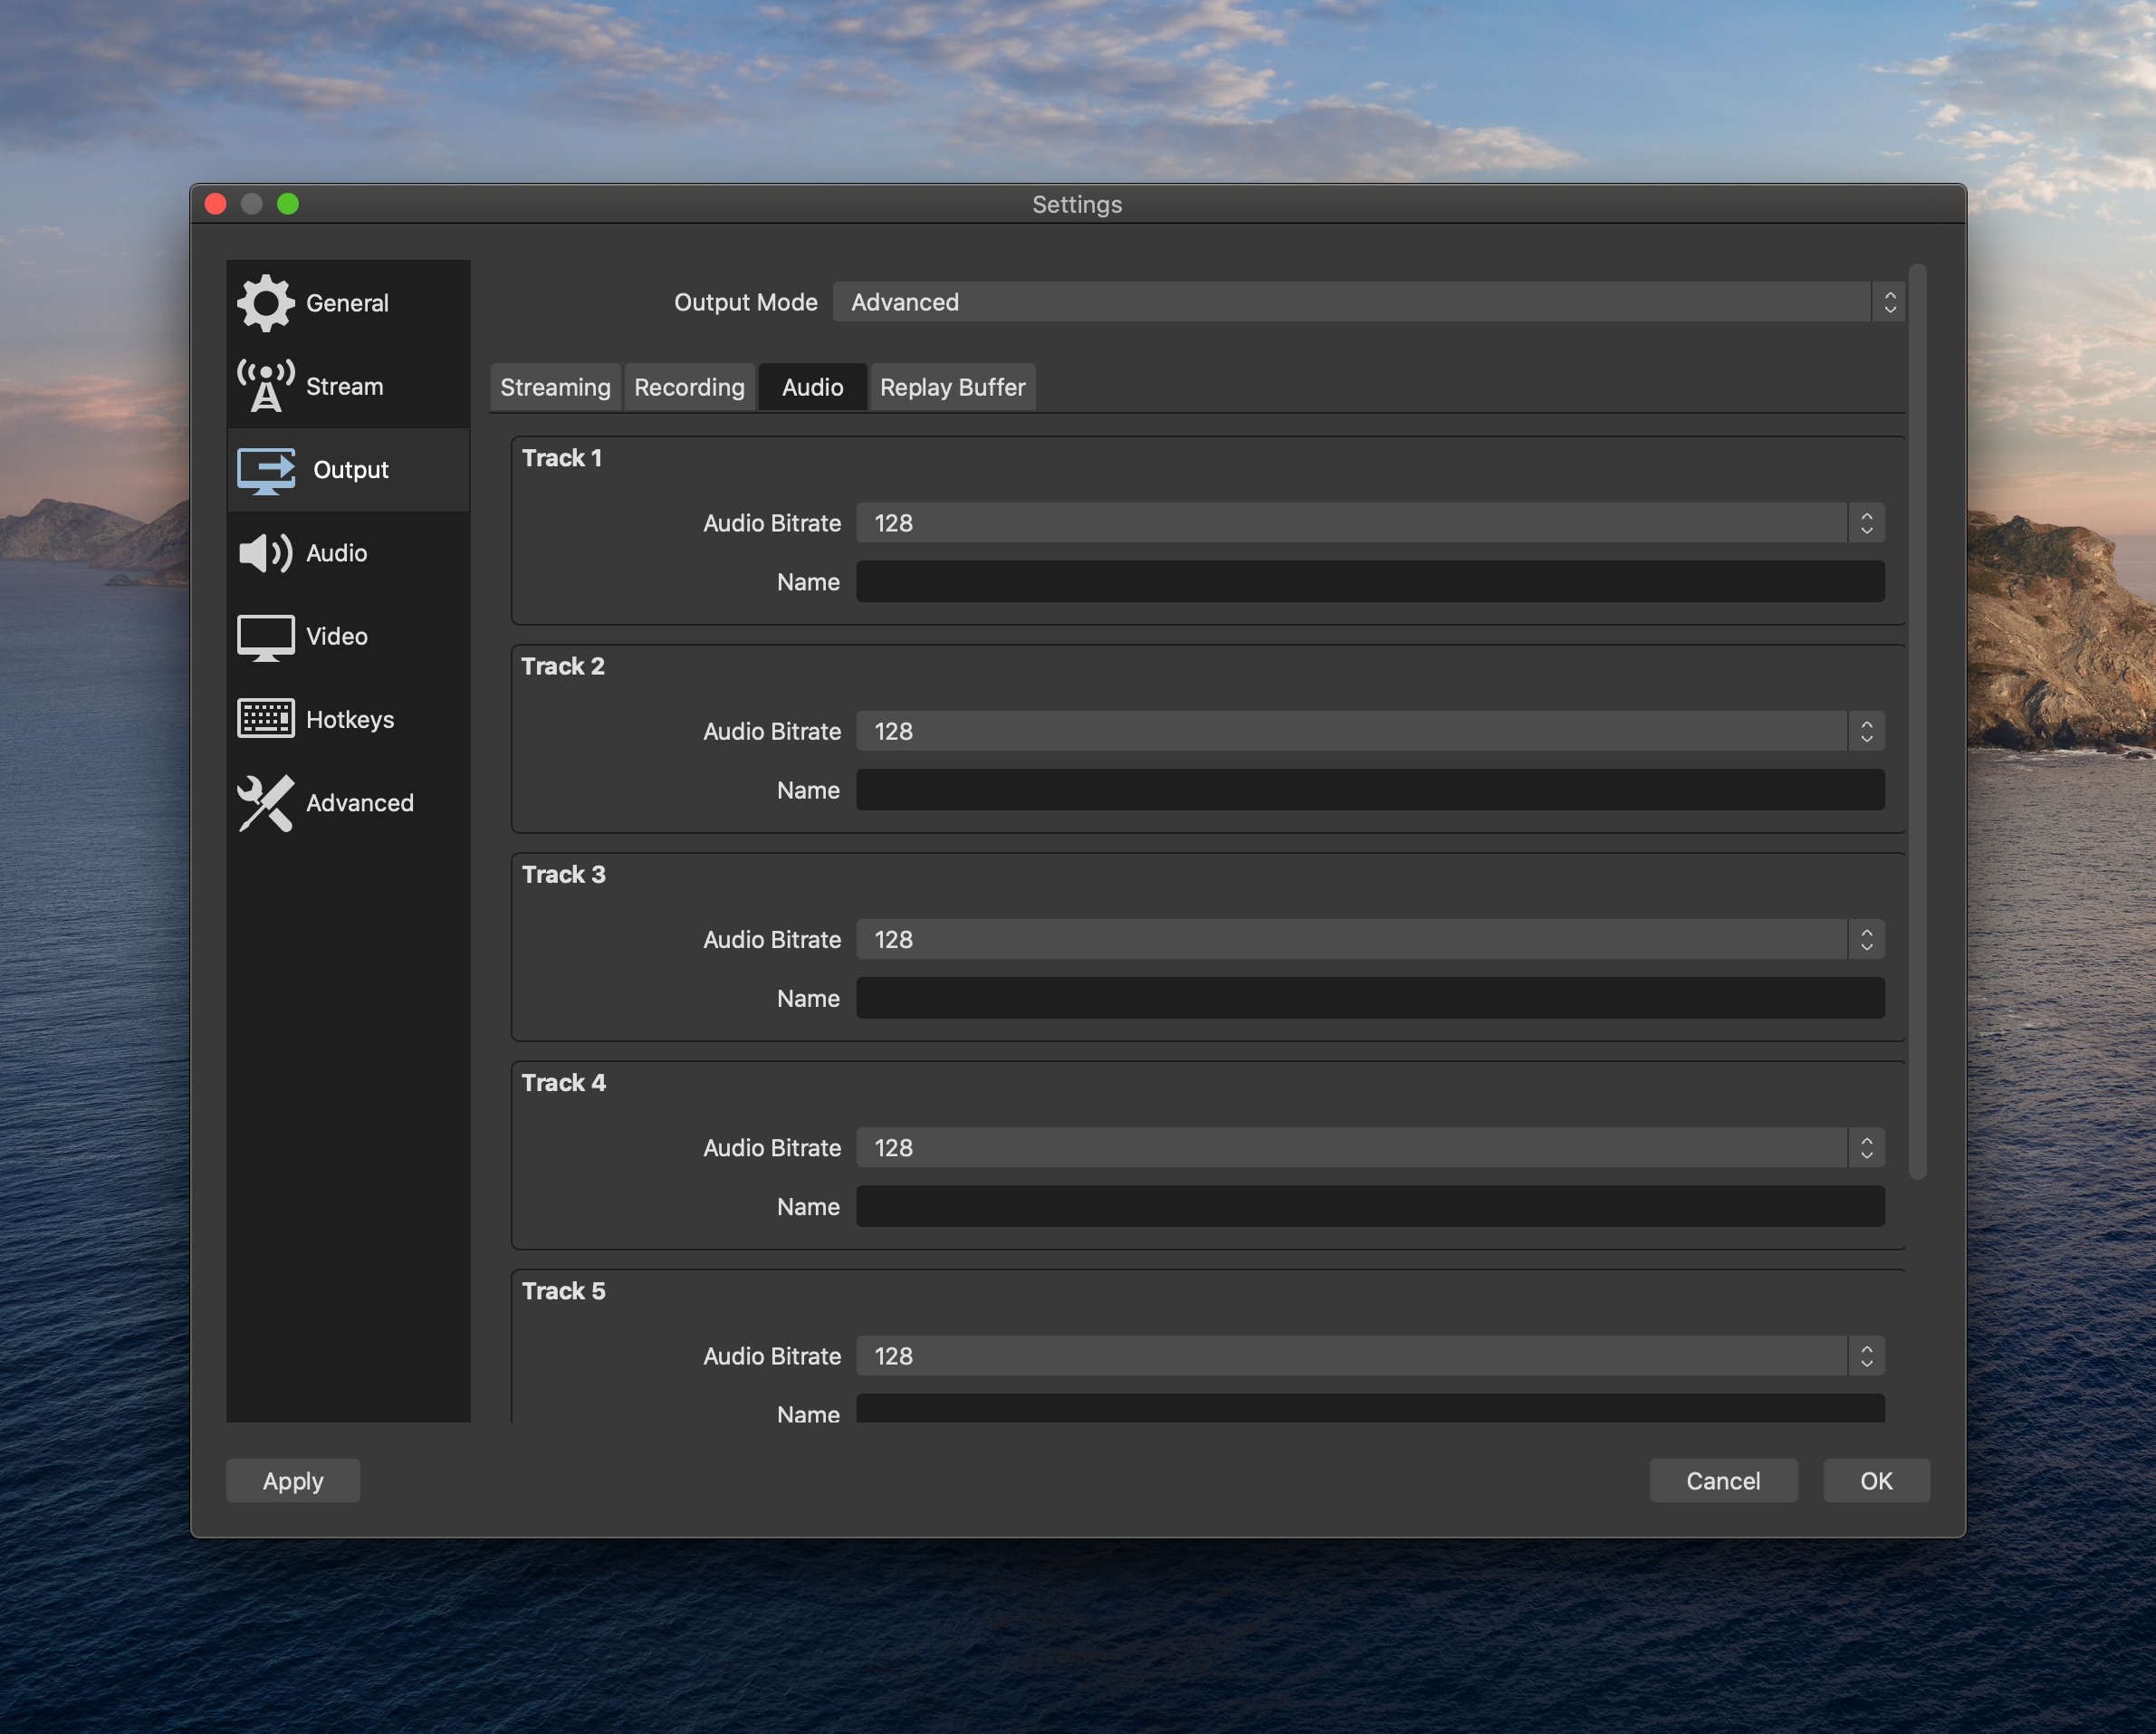
- Set the “Audio Bitrate” to “128” in all of your tracks. That’s the recommended YouTube audio bitrate. You’re probably only using Track 1, but change them all just in case you’re doing something fancier in the future.